Installation Video Guide
Step-by-Step Tutorial
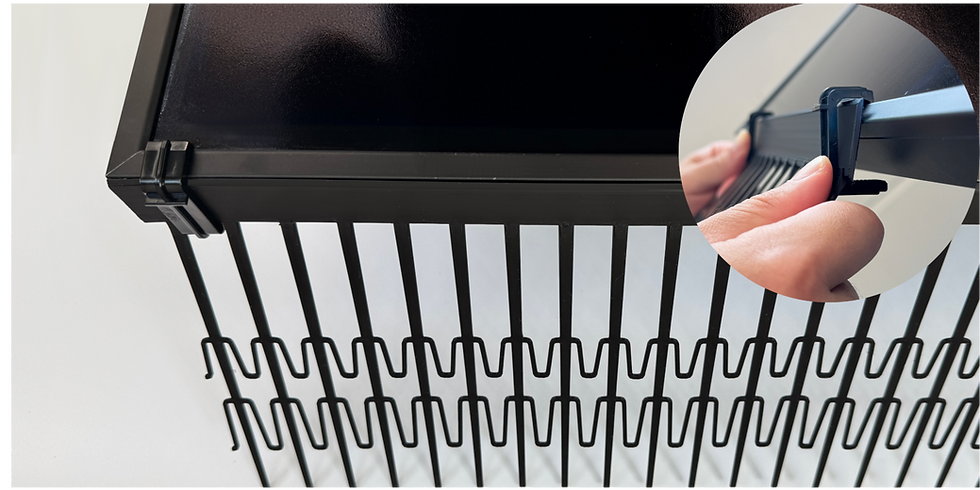
Step 1 Start from the PV edge
Attach PV Protector to the outer edge of the solar panel using the C-Clip. As shown, press the top edge of the C-Clip and click into position.
Step 2 Place C-Clips every 20 cm (maximum)
Use one C-Clip every 20 cm at most to ensure firm attachment.

Step 3 Use on all frame edges
The C-Clip fits both short and long sides of most mainstream solar panel frames.
.png)
Step 4 Connect PV Protector sections
Use cable ties to join the PV Protector sections. Connect the upper and lower meshes to enhance overall stability.

Step 5 Trim around brackets
When installing over mounting rails, cut only the necessary section of the PV Protector — do not cut through the entire section. This maintains continuity and ensures full 360° protection.

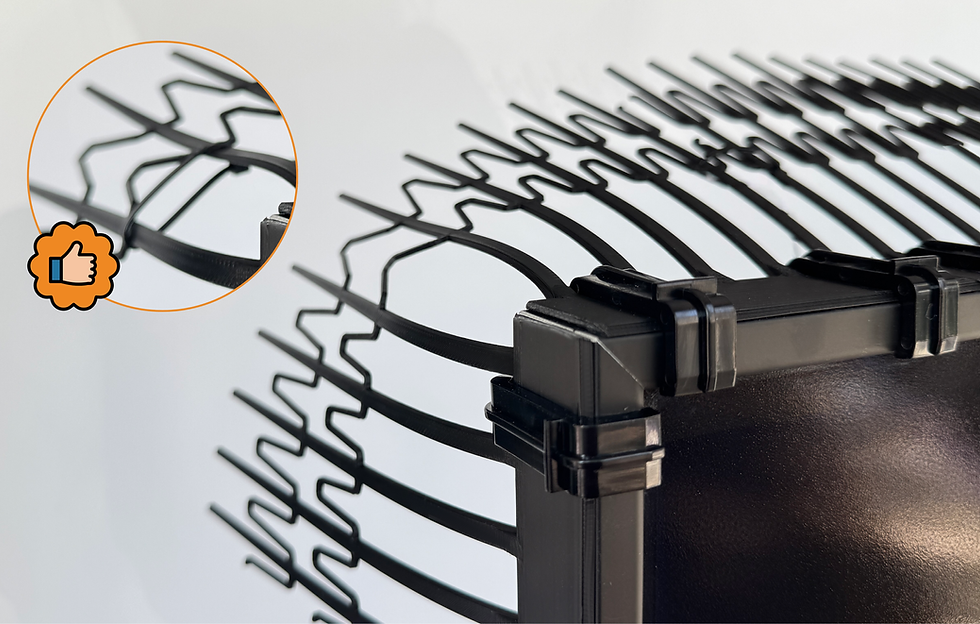
Step 6 Bend and fix at corners
At 90° corners of the PV system, trim only the top row of PV Protector and bend it inward or outward to form a right angle. Secure both ends with C-Clips. Use cable ties to reinforce the outer corner.