
Solar Cable Management Best Practices for PV Installers
- Mar 17
- 7 min read
Updated: Mar 28
Solar cable management bird protection — Published by PV Protector® | Category: Installation Best Practices
Solar Cable Management
In a well-designed rooftop PV system, the modules, inverter, and mounting structure receive careful specification and installation. But the DC cabling that connects these components — carrying 300–600 V under full irradiance — is too often treated as a secondary concern.
This is a costly oversight. Poor cable management is one of the most common causes of long-term PV system failure, and one of the most preventable. Loose cables chafe against module frames, unsupported connectors develop high-resistance faults, and exposed wiring beneath the array becomes an easy target for bird damage and environmental degradation.
This article outlines the cable management practices that professional installers use to ensure long-term system reliability, safety, and performance — and explains why cable protection is inseparable from bird protection in any well-commissioned PV installation.
Why Cable Management Matters
The DC wiring in a rooftop PV system operates under conditions that are inherently demanding. Cables are exposed to UV radiation, thermal cycling, wind loading, and moisture ingress for 25 years or more. Connectors must maintain low-resistance electrical contact over thousands of temperature cycles. And the entire cable infrastructure is located in a position that is difficult to inspect and expensive to repair.
When cable management is done well, these environmental stresses are manageable. When it is done poorly, they compound — and the consequences can be severe.
Performance Loss
High-resistance connections caused by strained or damaged connectors reduce the power output of the affected string. In a residential system with two or three strings, even a single degraded connection can reduce total system output by 5–15%. Because the loss develops gradually, it often goes unnoticed for years — costing the system owner significant revenue before the fault is identified.
Arc Fault Risk
When cable insulation is compromised — whether by mechanical abrasion, UV degradation, or wildlife damage — the risk of a DC arc fault increases significantly. A DC arc generates sustained temperatures exceeding 3,000°C and cannot be interrupted by conventional circuit protection as long as the PV modules are generating voltage. In a rooftop installation, this represents a direct fire hazard.
Warranty and Liability Exposure
Installers who deliver systems with poor cable management face increased warranty call-back rates, higher liability exposure in the event of system failure, and reputational damage that affects future business. Conversely, installers who demonstrate professional cable management build trust with customers and differentiate themselves in an increasingly competitive market.
Core Cable Management Principles
Route Cables Along Structural Elements
All DC cables should be routed along mounting rails, roof battens, or dedicated cable trays — never across open spans between modules. Cables that span unsupported distances sag under their own weight and thermal expansion, eventually making contact with sharp edges on module frames or mounting hardware.
The rule is straightforward: every section of cable should be supported by a structural element. If a cable run cannot follow an existing rail or batten, install a cable tray or conduit to bridge the gap.
Secure Cables at Regular Intervals
Cables should be secured at intervals of no more than 300–400 mm using UV-stabilised cable ties, stainless steel cable clips, or proprietary cable management channels. This prevents movement caused by wind loading and thermal cycling, and eliminates the gradual abrasion that occurs when cables shift against adjacent surfaces.
When using cable ties, select ties rated for outdoor UV exposure. Standard nylon cable ties degrade within 12–24 months of outdoor installation and will eventually fail, leaving the cables unsecured.
Maintain Positive-Negative Separation
Positive and negative string cables should be routed separately wherever practical. This reduces the probability of a phase-to-phase arc fault in the event that insulation is compromised on both cables simultaneously — a scenario that, while unlikely, carries the highest fault energy and fire risk.
Where separation is not physically possible — such as at the entry point to the inverter — cables should be routed in separate conduit sleeves or secured with adequate spacing maintained by cable clips.
Support All Connectors
MC4 and compatible connectors must be supported so that no mechanical load is transmitted to the crimped connection. An unsupported connector hanging under its own weight, or under the additional weight of a cable run, will experience cyclic mechanical stress at the crimp point. Over time, this loosens the connection, increases resistance, and creates a localised hot spot that can lead to connector failure or ignition.
Use connector support brackets, cable ties positioned behind the connector body, or route cables so that connectors rest on a mounting rail or structural surface.
Protect Cables from Sharp Edges
Solar Cable Management - Any point where a cable contacts a sharp or abrasive surface — such as a module frame edge, a mounting bracket corner, or a roof tile ridge — must be protected with conduit, edge protection tape, or a cable grommet. Even a slight burr on a mounting bracket can abrade cable sheathing over several years of thermal movement.
During installation, run your finger along every cable route to identify potential contact points. If you feel a sharp edge, protect it before the cable is secured in its final position.
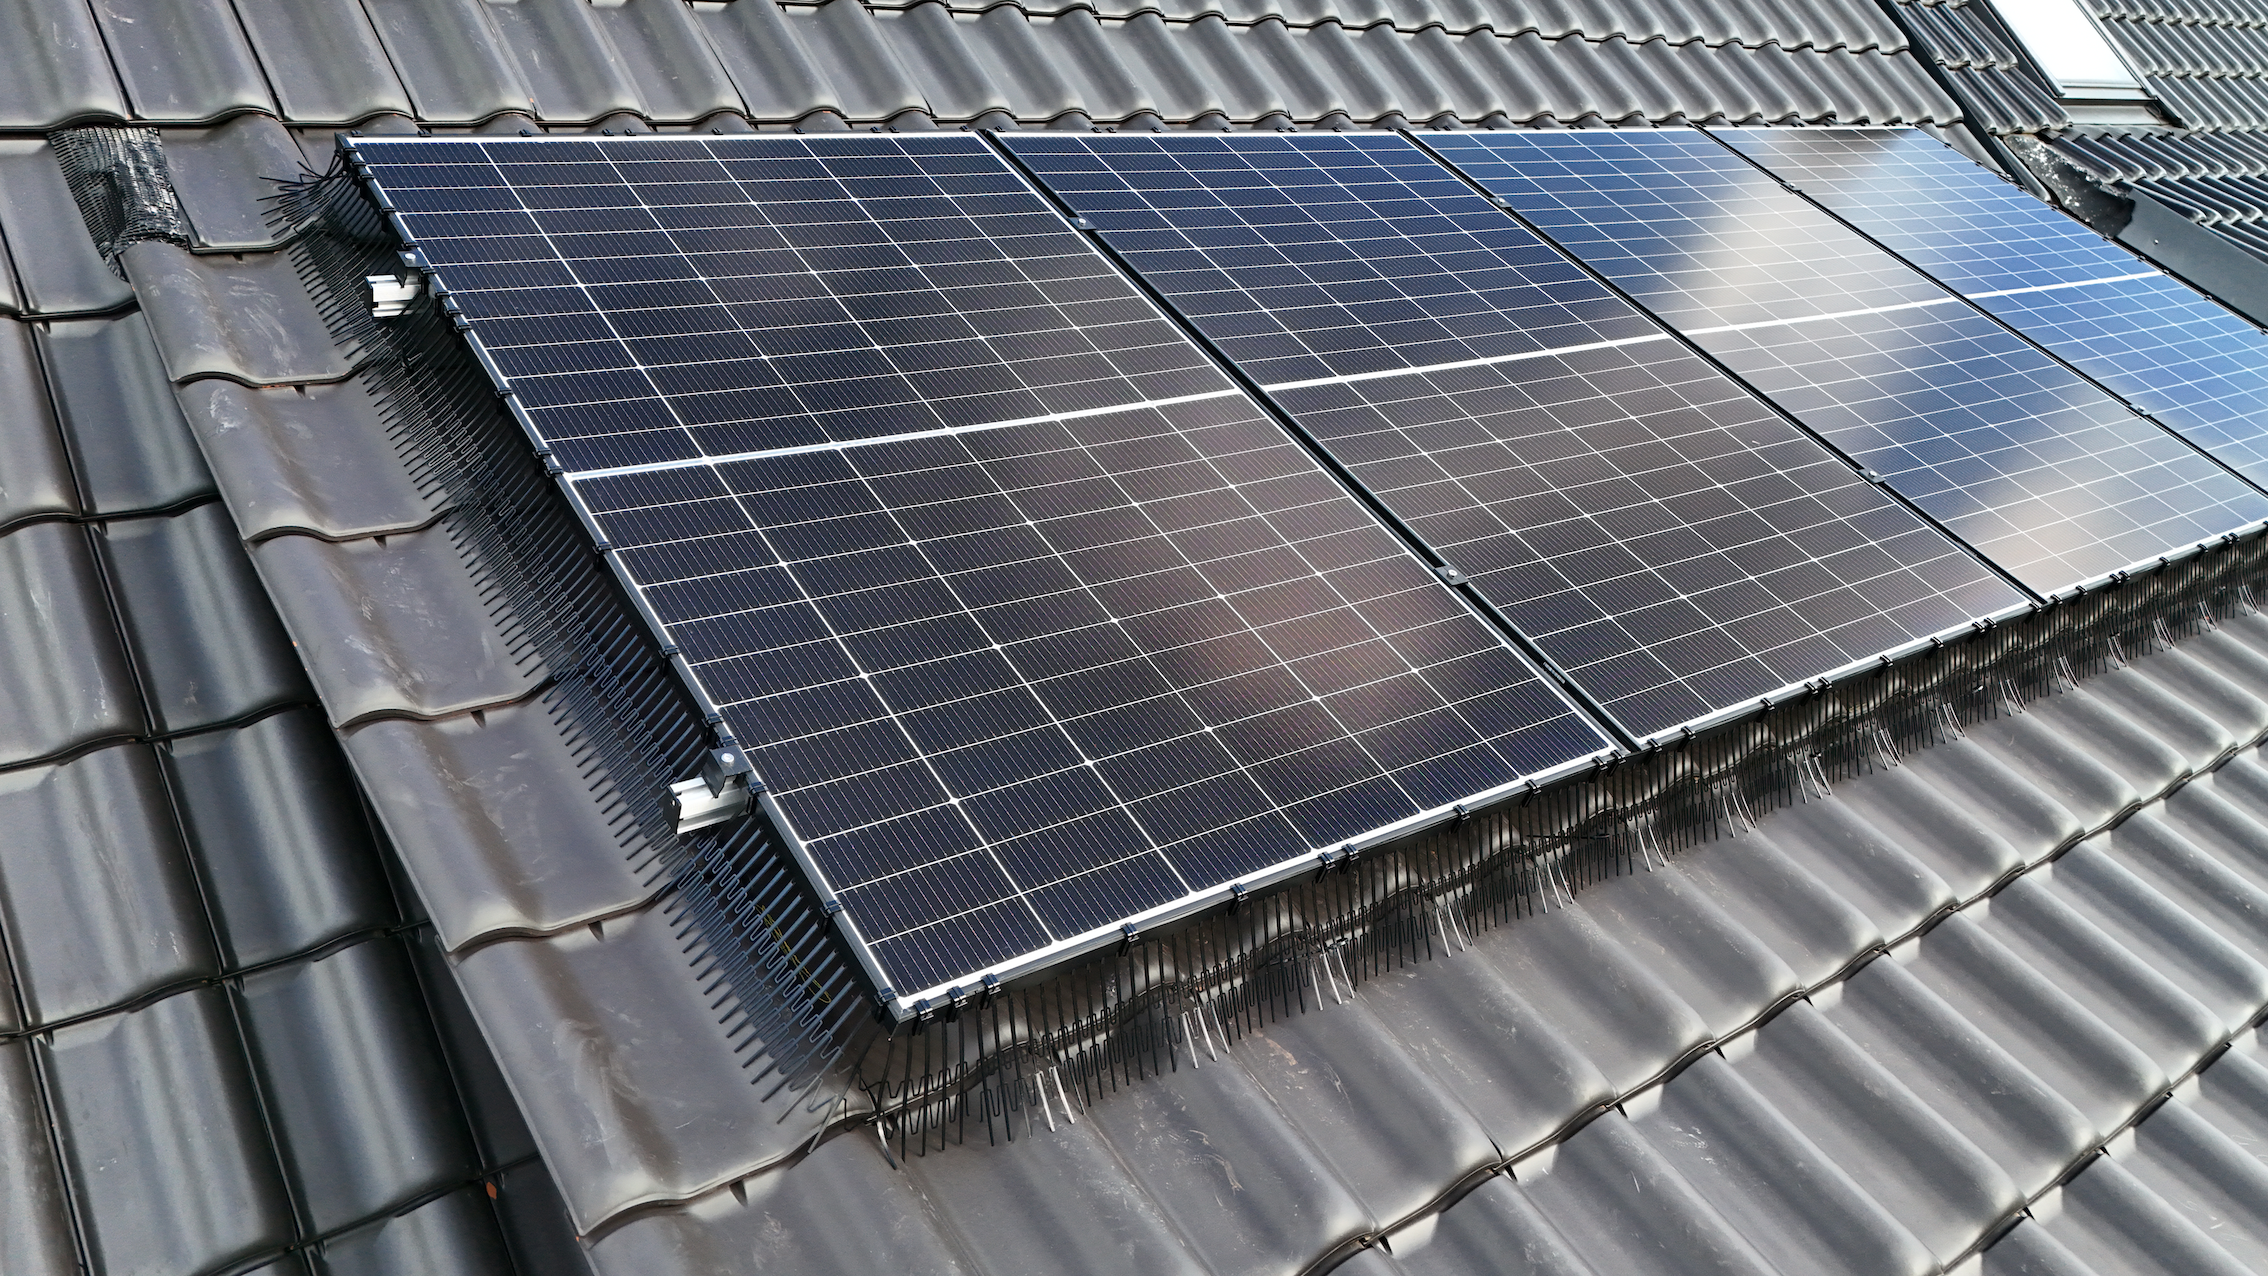
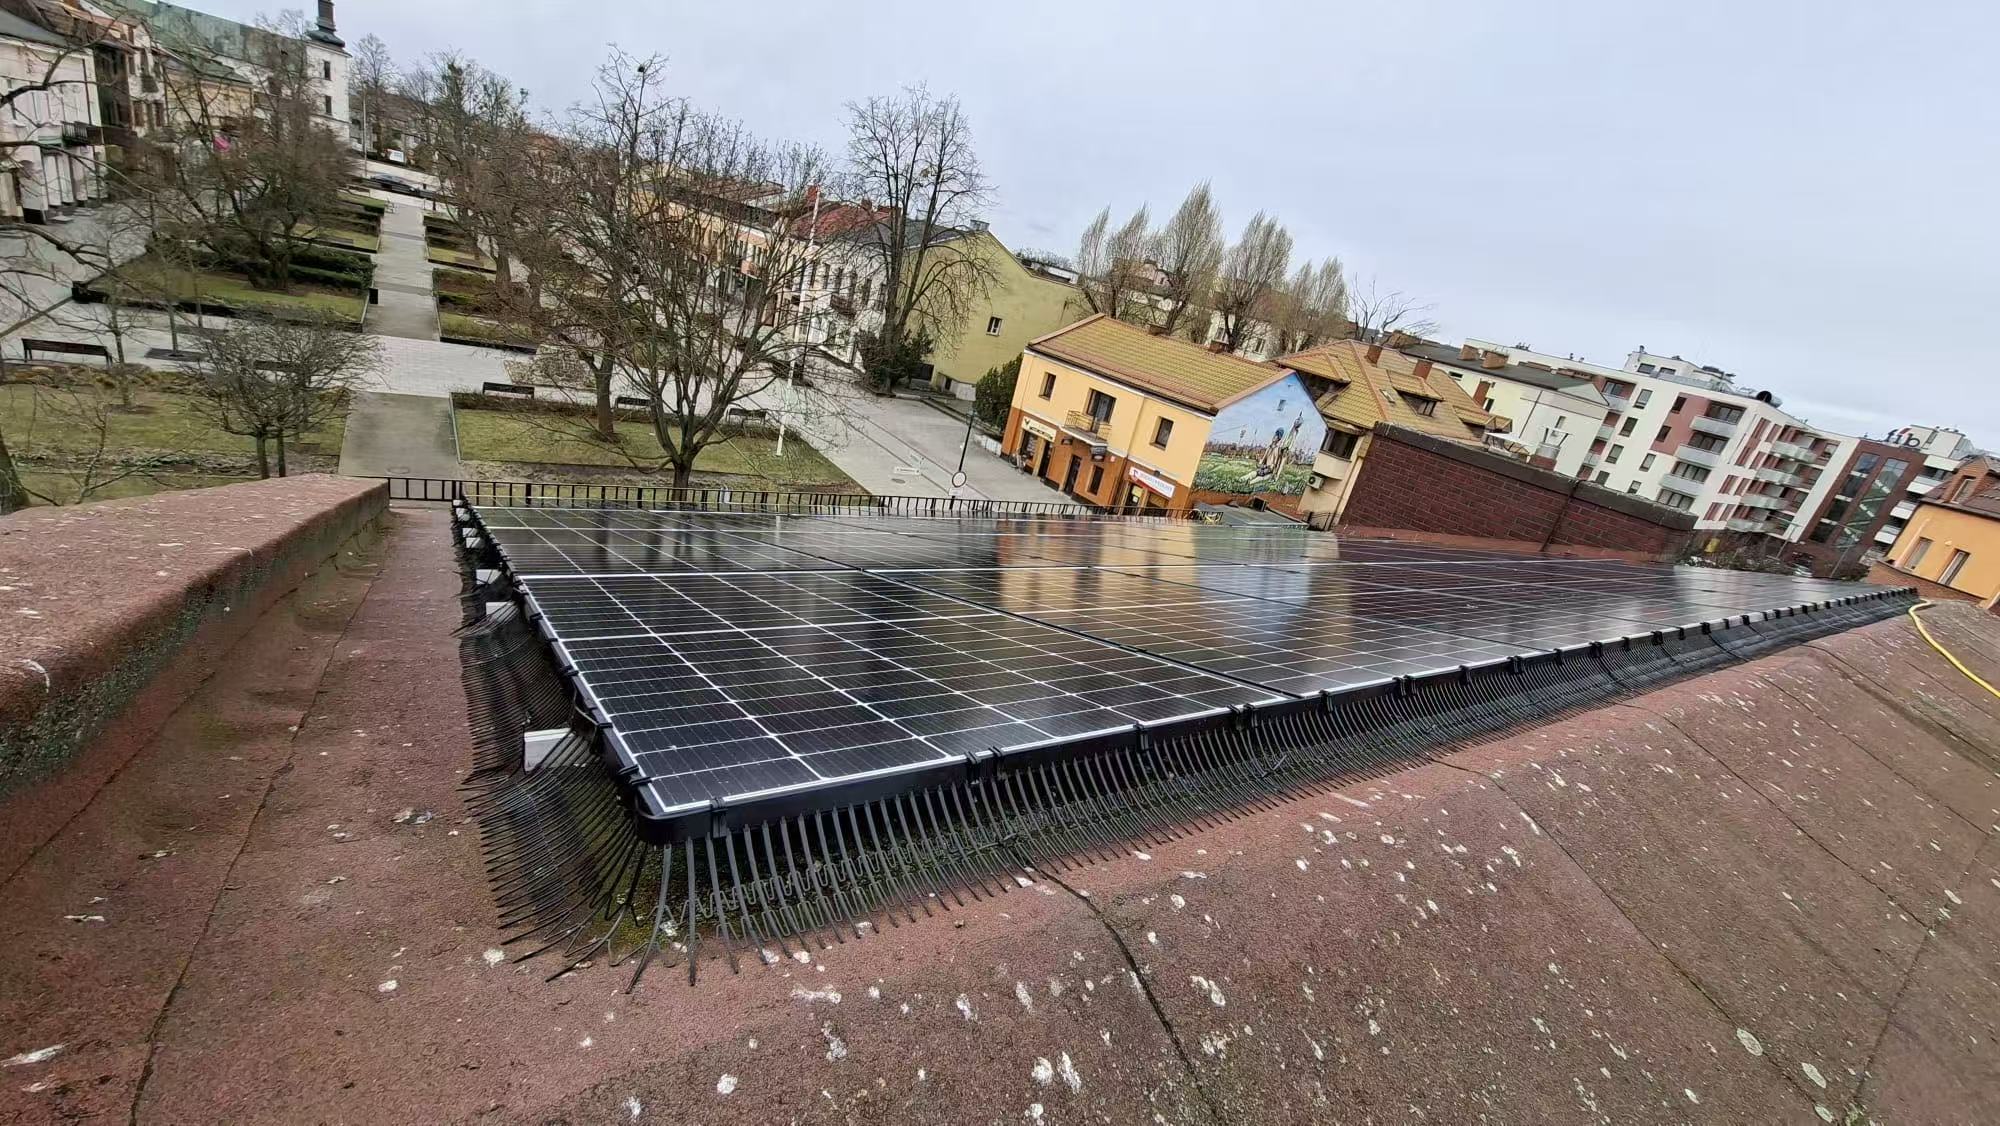
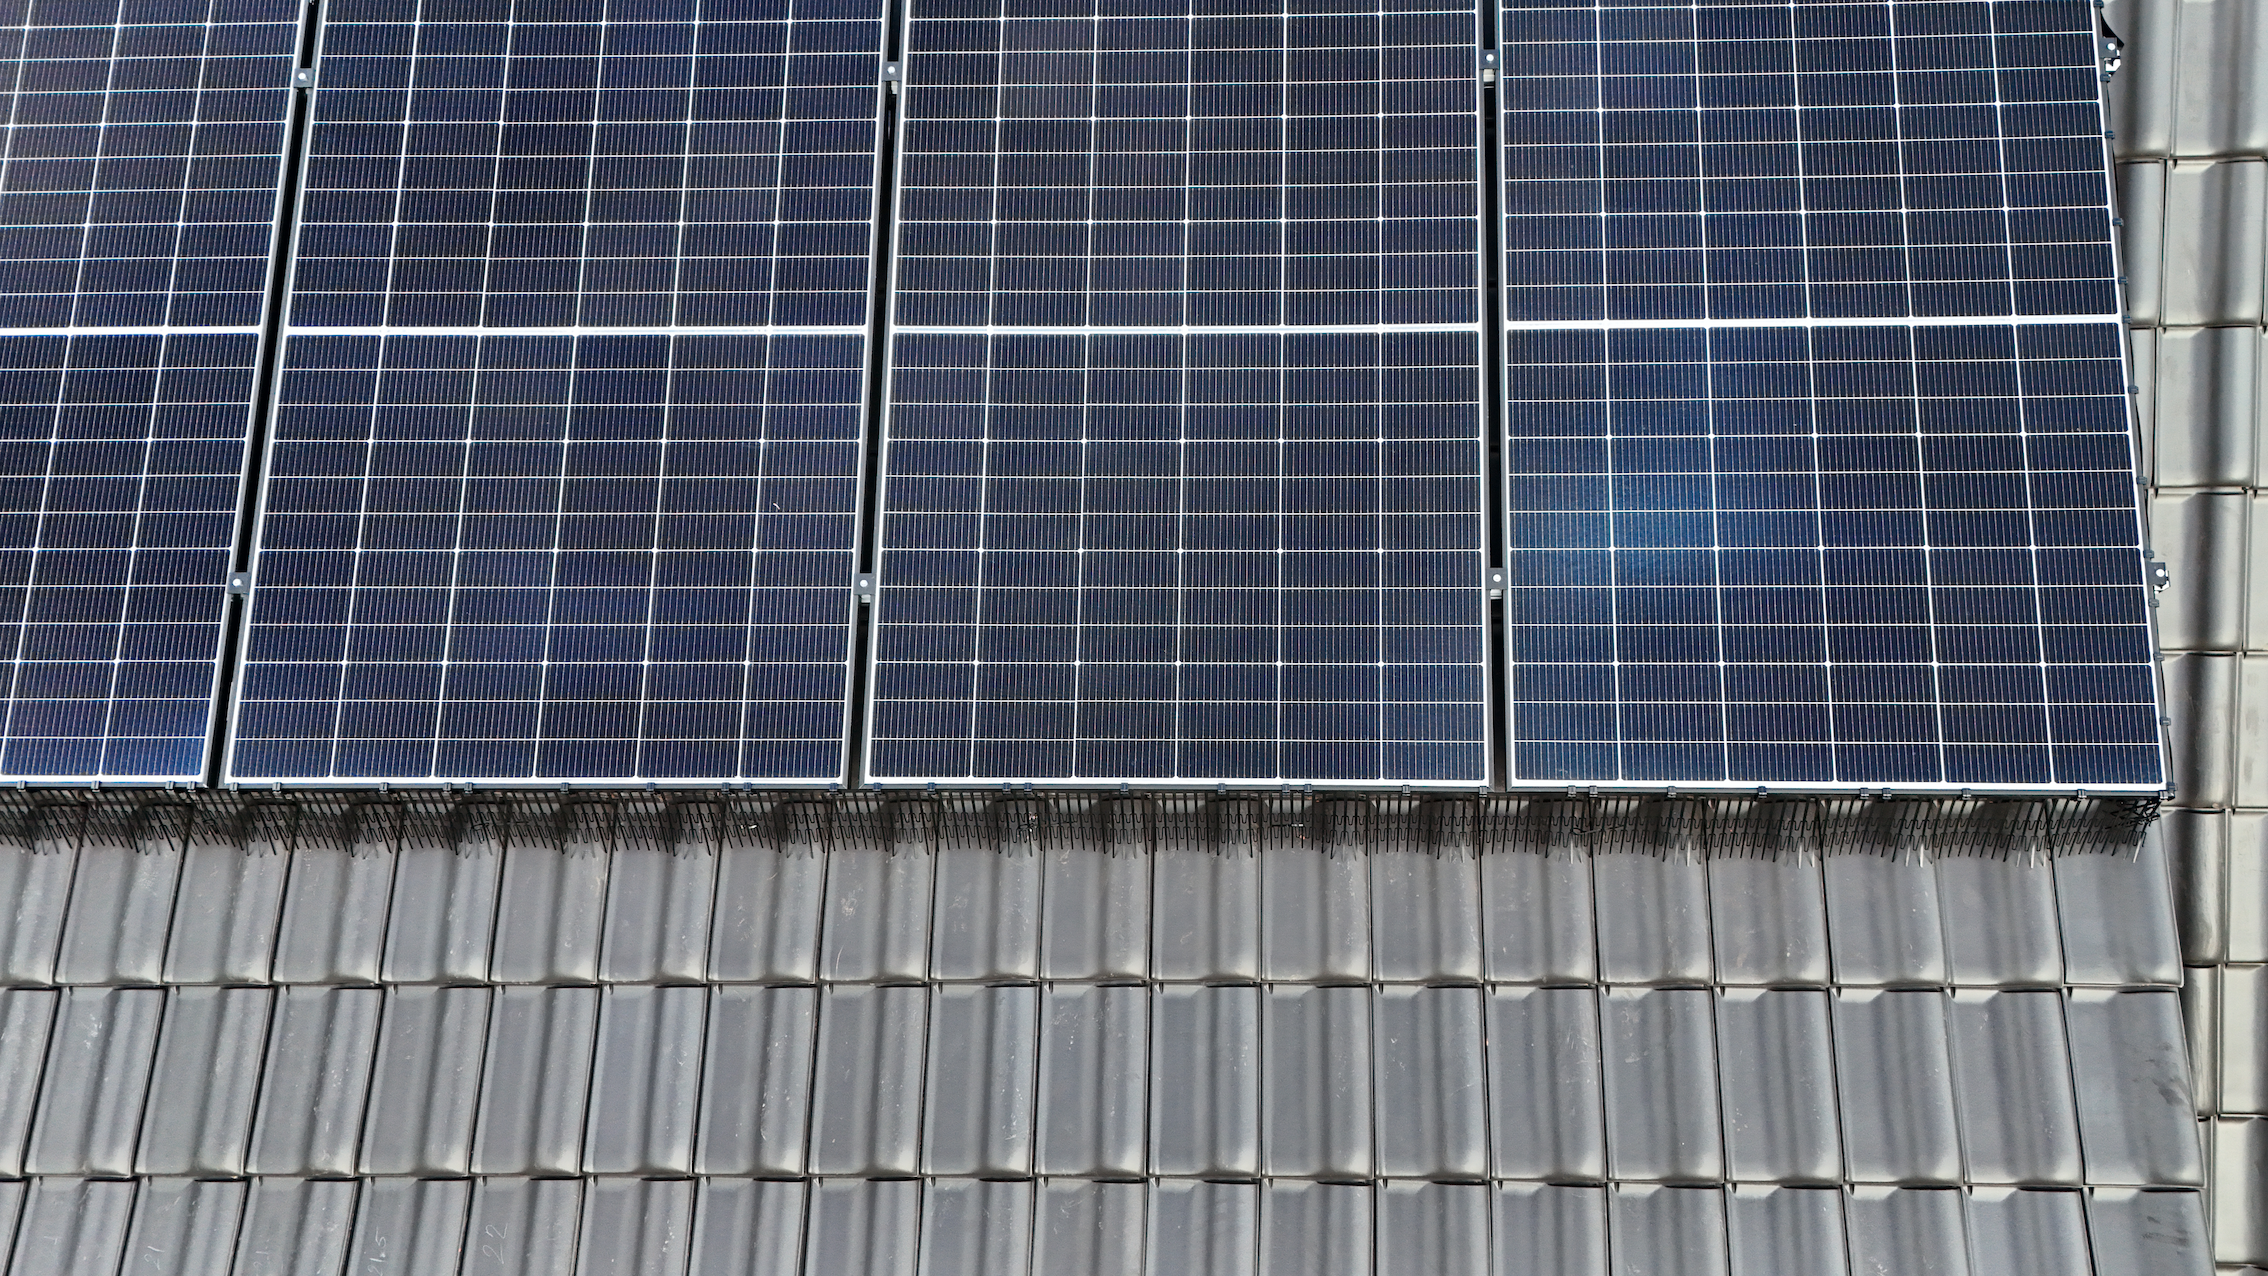
The Cable Management–Bird Protection Connection
Even the most carefully managed cable infrastructure is vulnerable if the under-panel cavity remains accessible to nesting birds.
How Birds Damage Cables
Pigeons, corvids, and other urban birds are attracted to the warm, sheltered cavity beneath PV modules as a nesting site. Once established, they interact directly with the cable infrastructure in several ways.
Birds peck at cable sheathing, MC4 connector housings, cable ties, and conduit fittings. This behaviour is driven by nest-building instinct and territorial activity. Over one or two nesting seasons, repeated pecking creates visible abrasion. In advanced cases, the sheathing is breached entirely, exposing the conductor.
Nesting material — dry straw, twigs, paper, textile fragments — accumulates around and on top of cable runs. This material traps moisture against cable surfaces, accelerating sheathing degradation. It also creates a fuel load in direct proximity to any potential arc fault ignition point.
Bird droppings contain uric acid, which is mildly corrosive to cable sheathing and connector materials over sustained contact periods.
Why Cable Management and Bird Protection Must Be Done Together
Professional cable management reduces the vulnerability of the wiring system to environmental stress. Bird protection eliminates the single largest external threat to cable integrity in urban and suburban PV installations. Neither measure is fully effective without the other.
A system with excellent cable routing but no bird protection will still suffer cable damage within two to three nesting seasons. A system with bird protection but poor cable management will still develop high-resistance faults and abrasion damage from inadequate support and routing.
The professional approach is to treat cable management and bird protection as complementary elements of the same commissioning process — both completed at the point of installation, when scaffolding is in place and the installer has full access to the array.
Commissioning Checklist: Cable Management
The following checklist summarises the key cable management steps that should be completed and verified before a PV system is signed off as commissioned.
First, verify that all DC cables are routed along mounting rails, roof battens, or cable trays — with no unsupported spans. Second, confirm that cables are secured at intervals of 300–400 mm using UV-rated ties or clips. Third, check that positive and negative string cables are separated wherever practical. Fourth, ensure all MC4 connectors are supported and that no mechanical load is transmitted to crimped connections. Fifth, inspect all cable contact points for sharp edges and verify that protection is in place. Sixth, confirm that cable entries to inverter, junction box, and building penetrations are sealed against moisture ingress. Seventh, verify that a bird protection mesh such as PV Protector® has been fitted around the full perimeter of the array, sealing the under-panel cavity.
Retrofit Cable Management for Existing Systems
For PV systems already in operation where cable management was not adequately addressed during commissioning, a retrofit programme is recommended.
Begin with a visual inspection of all accessible cable runs, paying particular attention to contact points with module frames, mounting brackets, and structural edges. Look for signs of abrasion, UV degradation, or wildlife damage on cable sheathing. Inspect all visible MC4 connectors for discolouration, cracking, or signs of thermal stress.
Where cable damage is identified, repair or replace affected sections before re-securing. Where bird activity has occurred, remove all nesting material and debris before conducting the cable inspection — nesting material may be concealing damaged cable sections.
After cable repair and re-routing, fit a clip-on mesh barrier such as PV Protector® around the full array perimeter to prevent recolonisation. This step is essential: without it, birds will return within days or weeks and the cable damage cycle will begin again.
Conclusion
Cable management is not a finishing detail or a cosmetic concern. It is a reliability, safety, and performance decision that directly affects the 25-year operational life of every rooftop PV system.
The principles are straightforward: route cables along structural elements, secure them at regular intervals, support all connectors, protect against sharp edges, and separate positive and negative conductors. These steps add 15–20 minutes to a residential installation and cost a fraction of the system value.
Combined with bird protection at the point of commissioning, professional cable management ensures that the DC wiring infrastructure remains intact, safe, and fully functional for the lifetime of the system — regardless of the environmental and wildlife pressures that every rooftop PV installation will face.
PV Protector® — Professional bird protection for photovoltaic systems.
Learn more at [www.pv-protector.com](https://www.pv-protector.com)
Comments