
How to Install Solar Panel Mesh: Complete Step-by-Step Guide for Installers
- Apr 23
- 7 min read
Updated: Apr 24
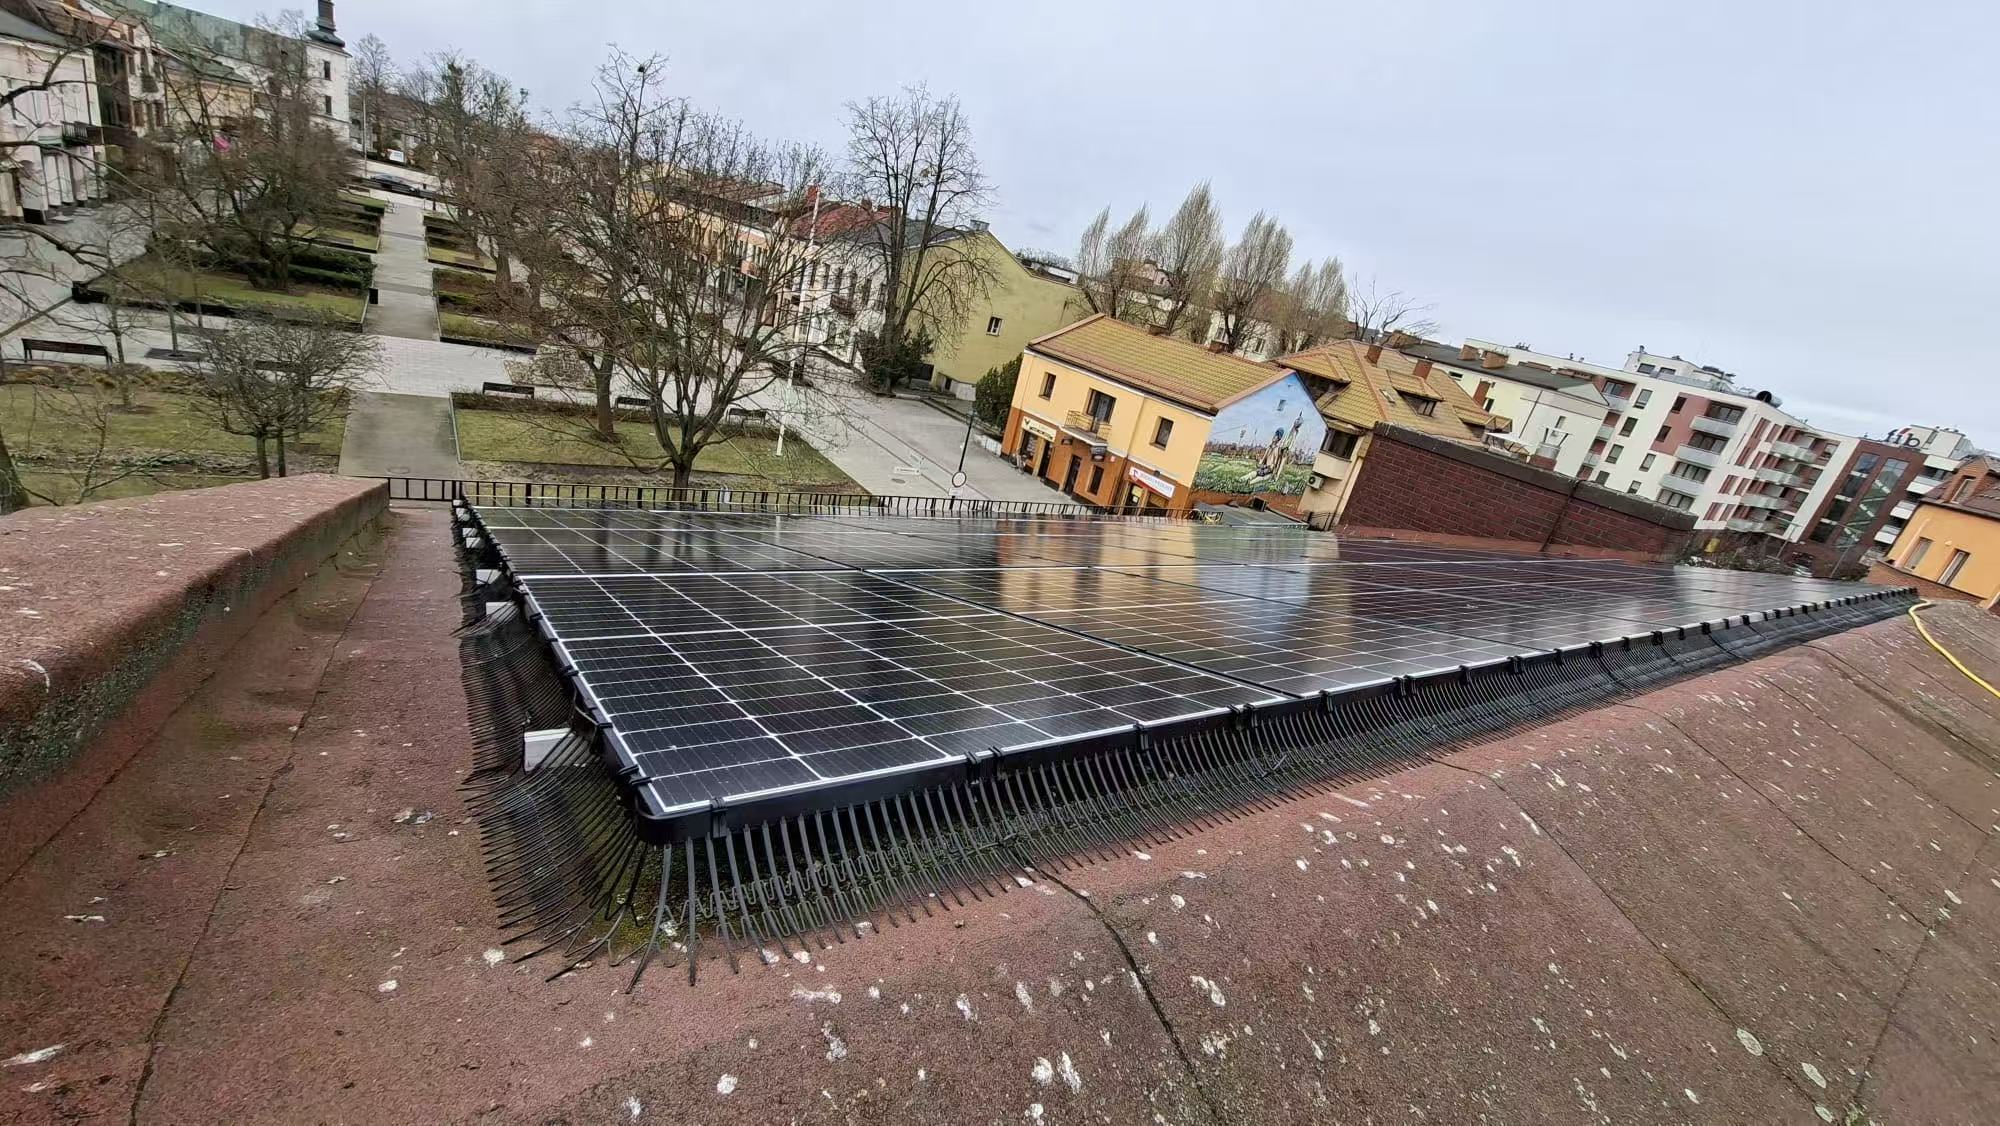
Installing bird protection mesh on a photovoltaic array is one of the most practical add-on services an installer can offer. When done correctly, the job takes minutes per panel, adds measurable value for the client, and eliminates the risk of callback visits for bird nesting or cable damage. The key is using a method that does not compromise panel warranties and fits into the standard commissioning workflow.
This guide walks through how to install solar panel mesh using a clip-on system, covering pre-installation preparation, the step-by-step fitting process, quality checks, and the common installation errors that slow down less experienced crews.
Why Clip-On Installation Beats Drilling and Adhesives
Before explaining how to install solar panel mesh, it is worth understanding why the mounting method matters. Traditional bird guard systems use screws drilled into the panel frame, or adhesive tapes bonded to the module surface. Both approaches create warranty risks and installation complexity.

Drilling into an aluminium panel frame can create stress points that compromise the frame's structural integrity, potentially voiding manufacturer warranties. Adhesive bonding works in dry conditions but fails in wet or cold weather, and removal for panel servicing often damages the frame coating.
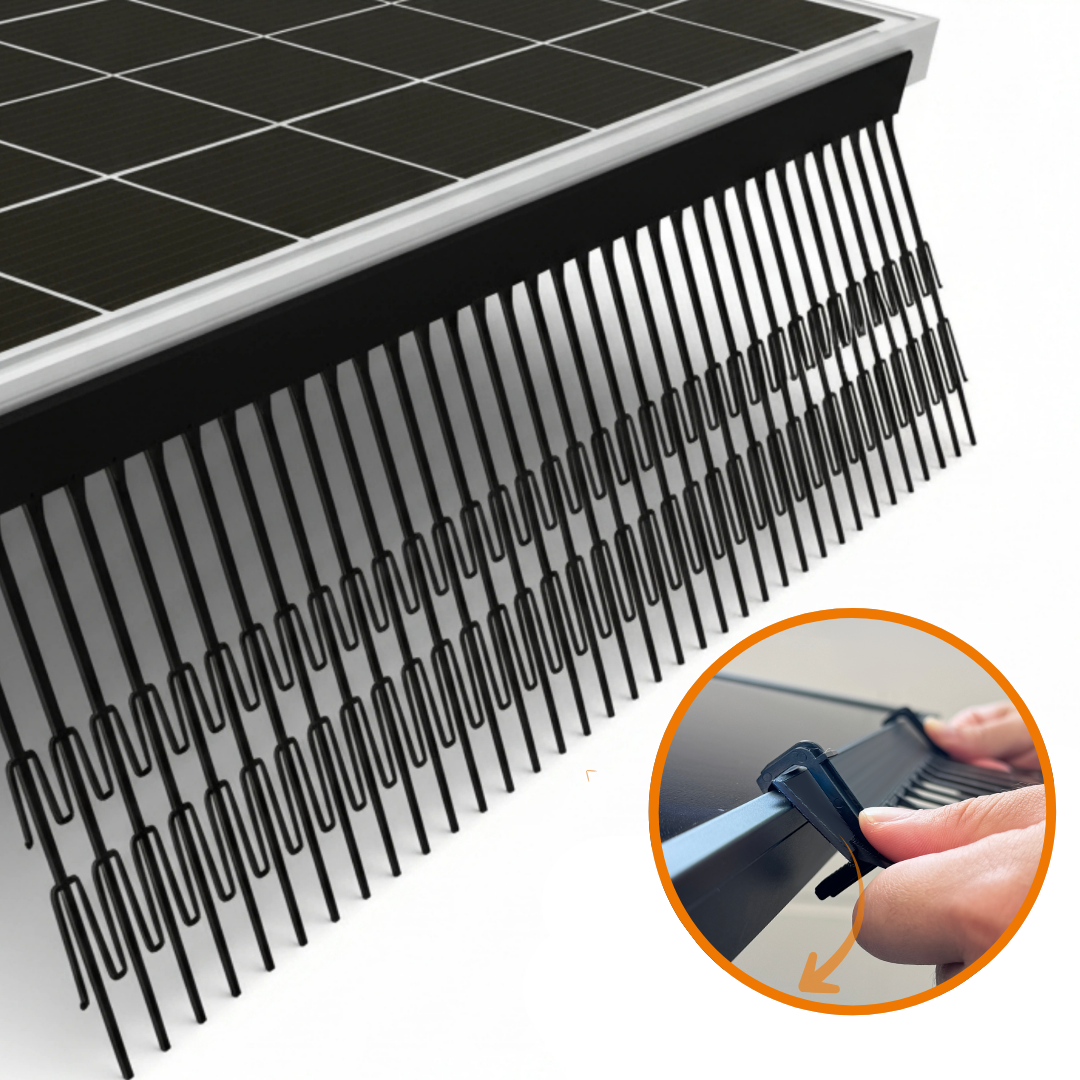
A clip-on system eliminates these problems. The C-Clip design attaches to the panel frame edge without modification, fits all standard frame heights (30 mm, 35 mm, and 40 mm profiles), and allows tool-free installation. For installers managing tight project schedules, this means faster commissioning and no specialised equipment required on site.
The full system includes three components: HDPE mesh segments with UV stabilisation, C-Clips for frame attachment, and cable ties for securing segment joints. Understanding how to install solar panel mesh with this configuration is the foundation of an efficient installation workflow.
Pre-Installation Preparation: Tools and Site Survey
Proper preparation reduces installation time and avoids mid-job interruptions. The tools required for how to install solar panel mesh using a clip-on system are minimal:
- Tape measure (for calculating perimeter length) - Utility knife or scissors (for trimming cable ties) - Gloves (for handling mesh segments) - Safety harness and fall protection equipment (standard rooftop work PPE)
No drills, adhesives, or power tools are needed. This is the primary advantage of the clip-on method.
Before starting, conduct a quick site survey:
1. Measure the total perimeter length of the array. Each mesh segment covers approximately 500 mm, so a 10-panel array (5 panels × 2 rows) typically requires 12–15 segments depending on layout. 2. Check frame profile height. Most residential panels use 35 mm frames; commercial thin-film modules may use 30 mm or 40 mm. Verify before ordering clips. 3. Inspect for obstructions. Cable clips, mounting rail edges, or roof flashing may interfere with mesh placement. Note these during the survey. 4. Photograph the array before installation. This provides commissioning documentation and protects against future warranty disputes.
Installers who include bird protection as a standard line item in their quotes often complete this survey during the initial site visit, adding minimal time to the overall project workflow. For more on structuring bird protection within your installation packages, see how to quote bird protection as a standard package.
Step-by-Step: How to Install Solar Panel Mesh with C-Clips
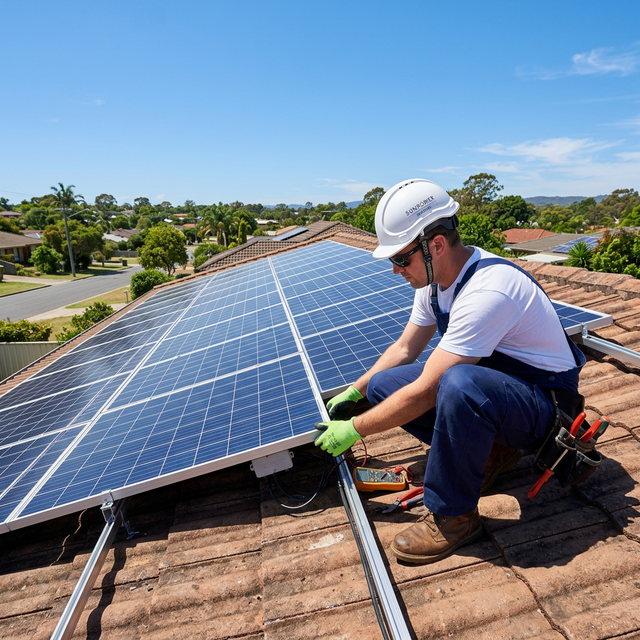
This section details the complete installation process for a clip-on bird protection system. The workflow assumes a pitched-roof residential array with standard-height aluminium panel frames.
Step 1: Start at the Lower Array Edge
Begin installation at the lowest edge of the array where the gap between the panel and roof surface is largest. This is the primary entry point for pigeons and other nesting birds.
Hold the first mesh segment against the frame edge and align the top edge of the segment with the underside of the panel frame. The mesh should extend downward, forming a vertical barrier between the panel edge and the roof.
Step 2: Attach the First C-Clip
Take a C-Clip and slide it onto the panel frame edge, capturing both the frame lip and the mesh segment edge. The clip should grip firmly without excessive force. If the clip slides on too easily, verify you have the correct clip size for the frame height.
Position clips approximately 250 mm apart along the perimeter. This spacing provides secure attachment without using excessive clips.
Step 3: Continue Along the Perimeter
Work around the array perimeter, attaching each mesh segment sequentially. Where two segments meet, overlap the edges by 20–30 mm and secure the joint with a cable tie. The cable tie should pass through the mesh openings and be tightened enough to prevent gaps but not so tight that it distorts the mesh shape.
For corners, fold the mesh segment at a 90-degree angle and secure with additional cable ties. The mesh is flexible enough to conform to corner profiles without cutting, which speeds up installation and reduces material waste.
Step 4: Handle Cable Penetrations
Where DC cables exit the array, create a small notch in the mesh using a utility knife. The notch should be just large enough for the cable to pass through without leaving a gap that birds can exploit. Secure the mesh around the cable exit point with a cable tie looped around both the mesh and the cable conduit.
This step is critical. A poorly sealed cable penetration is the most common weak point in an otherwise correct installation. Installers should spend an extra minute here rather than risk a callback visit six months later when birds discover the gap.
Step 5: Secure the Upper Array Edge
Once the lower and side perimeters are complete, finish the installation by securing the upper array edge. On a pitched roof, this edge is less critical for bird entry (birds typically enter from below), but completing the perimeter ensures full coverage and prevents wind-driven debris accumulation.
Attach the final mesh segment and clip, then trim any excess cable tie length with a utility knife. The trimmed installation looks cleaner and eliminates sharp edges that could snag during future roof access.
Commissioning Checks: Verifying Installation Quality
After completing the mesh installation, perform a quality check before leaving the site:

1. Visual inspection: Walk the array perimeter and confirm there are no gaps larger than 20 mm. Small gaps at corners or cable exits should be sealed with additional cable ties. 2. Clip engagement: Pull gently on several clips to verify they are fully engaged with the frame edge. A properly fitted clip should not slide or detach with moderate hand pressure. 3. Mesh tension: The mesh should hang vertically without sagging or buckling. Sagging indicates insufficient clip spacing or incorrect mesh length. 4. Documentation: Photograph the completed installation from multiple angles. This provides evidence of proper installation for warranty purposes and client records.
Installers who follow a structured commissioning process avoid the most common first-time mistakes. For a detailed list of errors and how to prevent them, review common first-time mistakes in bird mesh installation.
Installation Time and Workflow Integration
One of the most frequent questions installers ask is how long the job takes. For a single-storey residential array (10–15 panels), an experienced two-person crew typically completes mesh installation in 30–45 minutes. This includes setup, installation, and commissioning checks.
For larger commercial arrays, installation time scales roughly linearly with perimeter length. A 50-panel array may take 90–120 minutes depending on roof access and array layout complexity.
The clip-on method integrates cleanly into the standard commissioning workflow. Most installers schedule mesh installation immediately after DC cable dressing and before final electrical testing. This sequencing ensures cables are in their final position before the mesh is fitted, avoiding the need to adjust or remove mesh later.
Including bird protection in every installation is becoming standard practice among forward-thinking installers. The service adds measurable value, differentiates your business from competitors, and reduces long-term maintenance obligations. For more on why installers are adopting this approach, see why bird protection belongs in every job.
Common Installation Challenges and Solutions
Even with a straightforward clip-on system, certain site conditions present challenges:
Non-standard frame profiles: Some manufacturers use proprietary frame shapes that do not accept standard C-Clips. In these cases, verify frame compatibility before ordering materials, or use adjustable clip variants if available.
Obstructed frame edges: Mounting rails, cable clips, or optimiser housings may block access to the frame edge. Where this occurs, attach the mesh to the nearest accessible frame section and use additional cable ties to bridge the obstructed area.
High-wind locations: Coastal or exposed sites may require additional clip spacing (200 mm instead of 250 mm) to prevent wind-driven mesh flutter. This adds minimal cost but improves long-term durability.
Panel servicing access: On systems where panels may need removal for future servicing, ensure clips can be easily released and refitted. The clip-on design supports this, but installers should document clip positions during initial installation to speed up future maintenance.
For installers seeking further guidance on integrating bird protection into their service offering, the practical guide for installers provides additional workflow recommendations and client communication strategies.
Tool-Free Installation Reduces Callbacks and Preserves Warranties
Understanding how to install solar panel mesh correctly is about more than following a procedure. It is about delivering a service that protects both the PV system and the installer's reputation. The clip-on method achieves this by eliminating drilling, adhesives, and warranty risks while fitting seamlessly into the standard commissioning process.
Installers who adopt structured installation workflows and quality checks consistently report fewer callbacks, higher client satisfaction, and stronger referral rates. As bird nesting becomes a more widely recognised risk in residential and commercial PV installations, offering professional bird protection installation is no longer optional — it is a competitive advantage.
For further reading on solar installation best practices and system protection, the International Renewable Energy Agency provides comprehensive guidance on PV system design and commissioning standards.
Frequently Asked Questions
How long does it take to install bird mesh on solar panels?
A typical residential array (10–15 panels) takes 30–45 minutes for a two-person crew using a clip-on system. Larger commercial arrays scale roughly linearly with perimeter length. Tool-free clip-on installation is significantly faster than screw-mounted or adhesive systems.
Do I need special tools to install solar panel mesh?
No specialised tools are required for clip-on mesh systems. You need only a tape measure, utility knife, and standard rooftop safety equipment. No drills, adhesives, or power tools are necessary, which simplifies site logistics and reduces installation time.
Will installing bird mesh void my solar panel warranty?
Clip-on mesh systems do not void panel warranties because they attach to the frame edge without drilling, adhesive, or modification to the panel structure. Always verify with the panel manufacturer if using screw-mounted or adhesive alternatives, as these methods carry warranty risks.
Can bird mesh be removed if panels need servicing?
Yes. Clip-on systems are fully removable and refittable, making them ideal for systems where panel access may be required for future maintenance or replacement. Release the clips, remove the mesh segments, and refit after servicing is complete.
What frame heights does the clip-on system fit?
Standard C-Clips fit panel frame heights of 30 mm, 35 mm, and 40 mm. Most residential panels use 35 mm frames, while commercial thin-film modules may use 30 mm or 40 mm profiles. Verify frame height during the pre-installation survey to ensure correct clip sizing.

Comments