
Drilling Solar Panel Frame: Why PV Protector® Uses No Screws, Hooks or Adhesives
Every accessory that goes onto a finished PV array has to answer one question first: how does it hold on? For bird protection, the obvious answers are the invasive ones. Put a self-tapping screw through the module frame. Hang a bracket off the rail. Run a bead of adhesive along the frame edge and press the part into it. All three work on a workbench. All three create a problem on a roof that somebody has to live with for the next two decades.
When PV Protector® was designed, those three fixing methods were considered and rejected — deliberately, and for reasons that have more to do with what happens in year eight than what happens on installation day. This article explains that reasoning. It applies to pitched-roof arrays on rails above tiles or metal sheeting, with a defined lower module edge; flat-roof, ground-mounted and open-field systems use different mounting logic and are outside the scope of this guide.
Drilling Solar Panel Frame Holes: What Actually Changes
The aluminium frame around a module is not trim. It carries the mechanical load of the laminate, transfers wind and snow load into the clamps, and forms part of the sealed edge that keeps moisture away from the cell layer and the backsheet. It is also the element the module was safety-qualified with. Modules are assessed against construction requirements under standards such as IEC 61730-1, which specifies the fundamental construction requirements for photovoltaic modules to provide safe electrical and mechanical operation. That assessment applies to the module as built.
Putting a hole through that frame changes three things at once.
The load path. The frame is a closed extruded section. A hole is a stress concentration, and its effect depends on where it sits relative to the clamping zone and the span. Nobody on the roof is in a position to calculate that, which is exactly the problem.
The corrosion picture. Anodising protects the surface of the extrusion, not the inside of a hole drilled through it afterwards. A drilled edge exposes bare aluminium, and a steel screw in an aluminium frame adds a dissimilar-metal contact in a location that stays wet after rain. On a roof that is expected to run for twenty-five years, that is a slow problem rather than an immediate one — which is why it rarely gets caught during commissioning.
The paperwork. In warranty terms, drilling solar panel frame holes counts as a modification of the module. Installation manuals routinely prohibit drilling additional holes or otherwise altering the frame, and a visible extra hole is unambiguous evidence during a claim assessment. Requirements vary between manufacturers, so check the specific installation manual for the modules on the roof before any accessory is fixed to them — but as a working rule, a modified frame is a weak position to argue from.
The Three Fixing Methods We Ruled Out
Screws and Self-Tapping Fasteners
A screw is the fastest way to make something stay put and the slowest thing to undo. Beyond the frame issues above, self-tappers create swarf. Aluminium and steel filings land on the roof covering and in the gutter, and they sit on the module glass until somebody washes them off. On a pitched roof the installer is also drilling one-handed, at an angle, often above head height — conditions that produce over-driven screws and stripped threads rather than clean fixings.
There is a second-order cost as well. A screwed accessory is not a component any more; it is part of the module assembly. Every future service action — swapping a module, chasing a fault, re-terminating a string — now involves removing fasteners from someone else's warranty item.
Hooks and Added Roof Penetrations
Hanging bird protection from a hook means either gripping something that was not designed to carry it, or making a new penetration in the roof covering. The first is a mounting assumption nobody has validated; the second adds a sealing point to a roof that already has exactly as many as the racking design intended.
Every additional penetration is a new maintenance liability and, in practice, a new dispute. Our solar pre-installation site survey checklist exists partly because roof condition around each existing hook is one of the things worth recording before anyone adds to it. A bird-protection layer that requires zero new penetrations simply removes that argument from the job.
Adhesives, Tapes and Sealants
Adhesive is the method that looks cleanest on installation day and ages worst. Bonding to an anodised aluminium frame or to module glass needs a clean, dry, correctly prepared surface and a cure window. Roofs are rarely clean, often not dry, and never patient. Surface preparation that is skipped or rushed produces a bond that holds through the handover and releases in the first hard winter.
The removal problem is worse than the bonding problem. Adhesive residue on a module frame or on glass has to be taken off with solvents or abrasion, both of which risk the anodised layer, the glass coating and the edge seal. A part that cannot be removed cleanly is a part that will eventually be removed badly.
What We Built Instead: Clamping Force, No Holes
The PV Protector® system holds on by gripping geometry the module already has — the lip of the frame — rather than by adding anything to it.
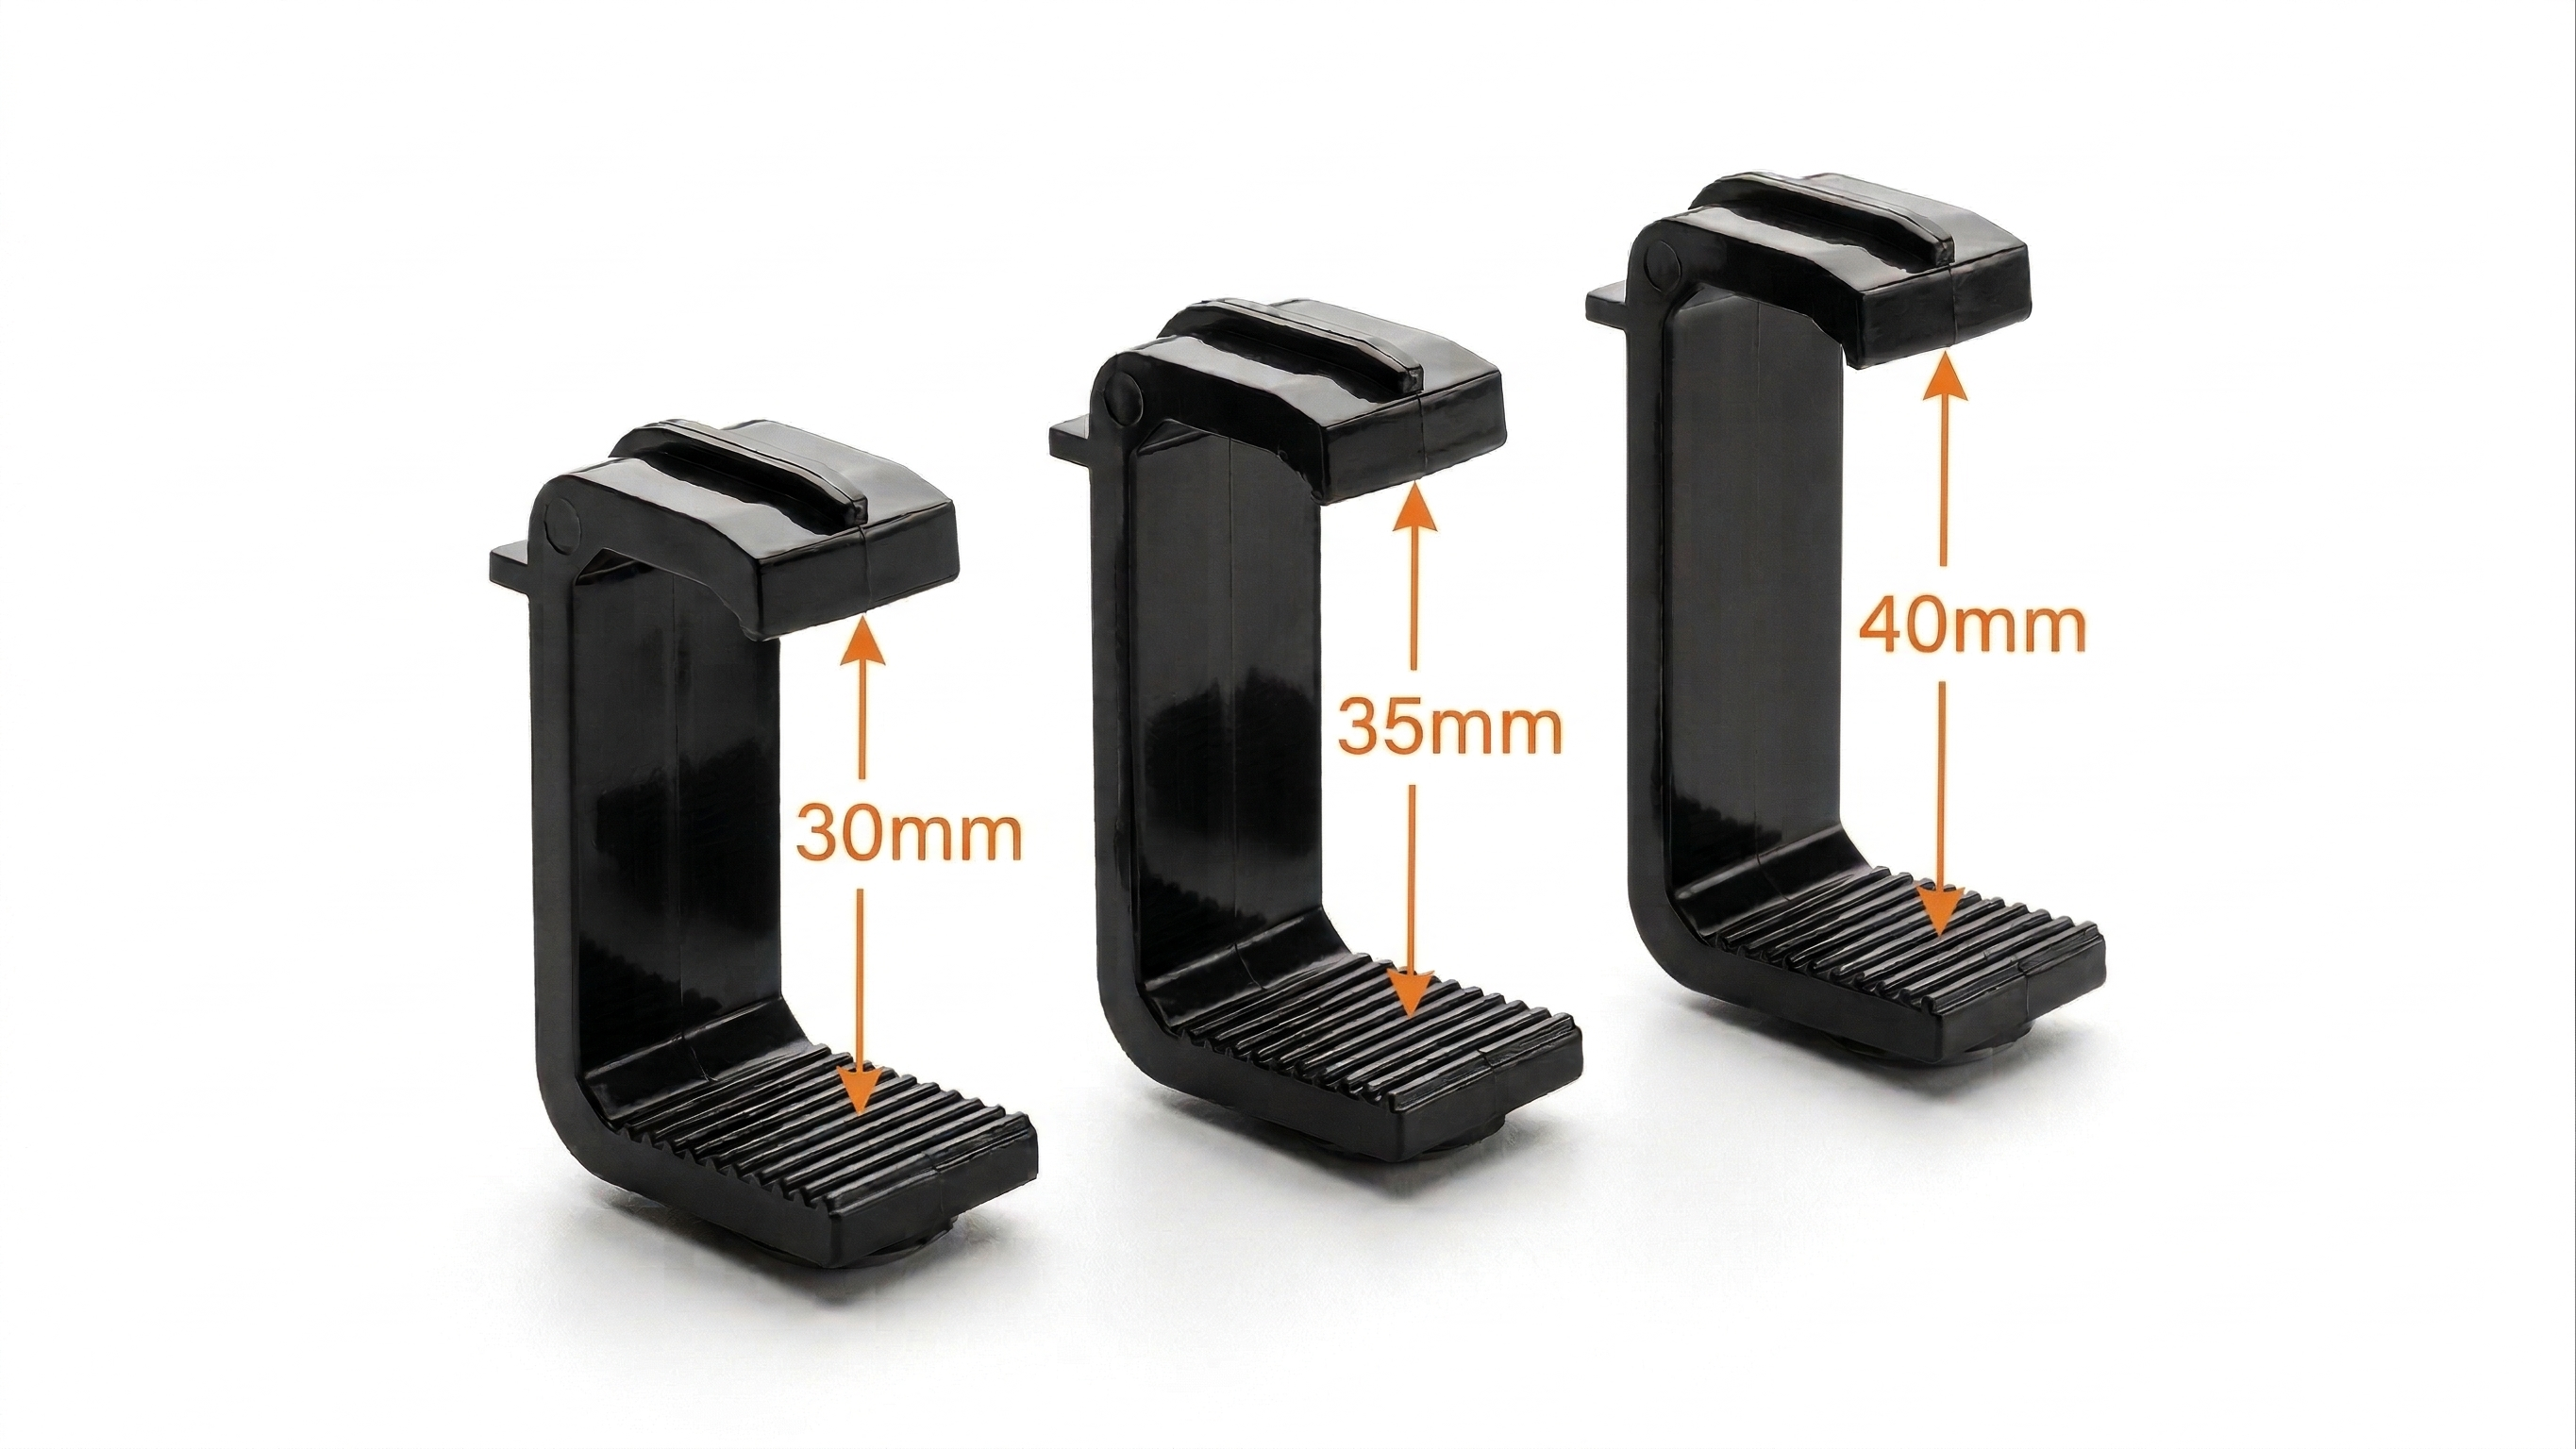
C-Clips, moulded from UV-stabilised PC+ABS, snap over the module frame and hold by spring tension. They are made for frame heights of 30, 35 and 40 mm, which covers the standard profiles in use on pitched-roof arrays. Nothing is drilled, nothing is glued, and the clip can be taken off again by hand.
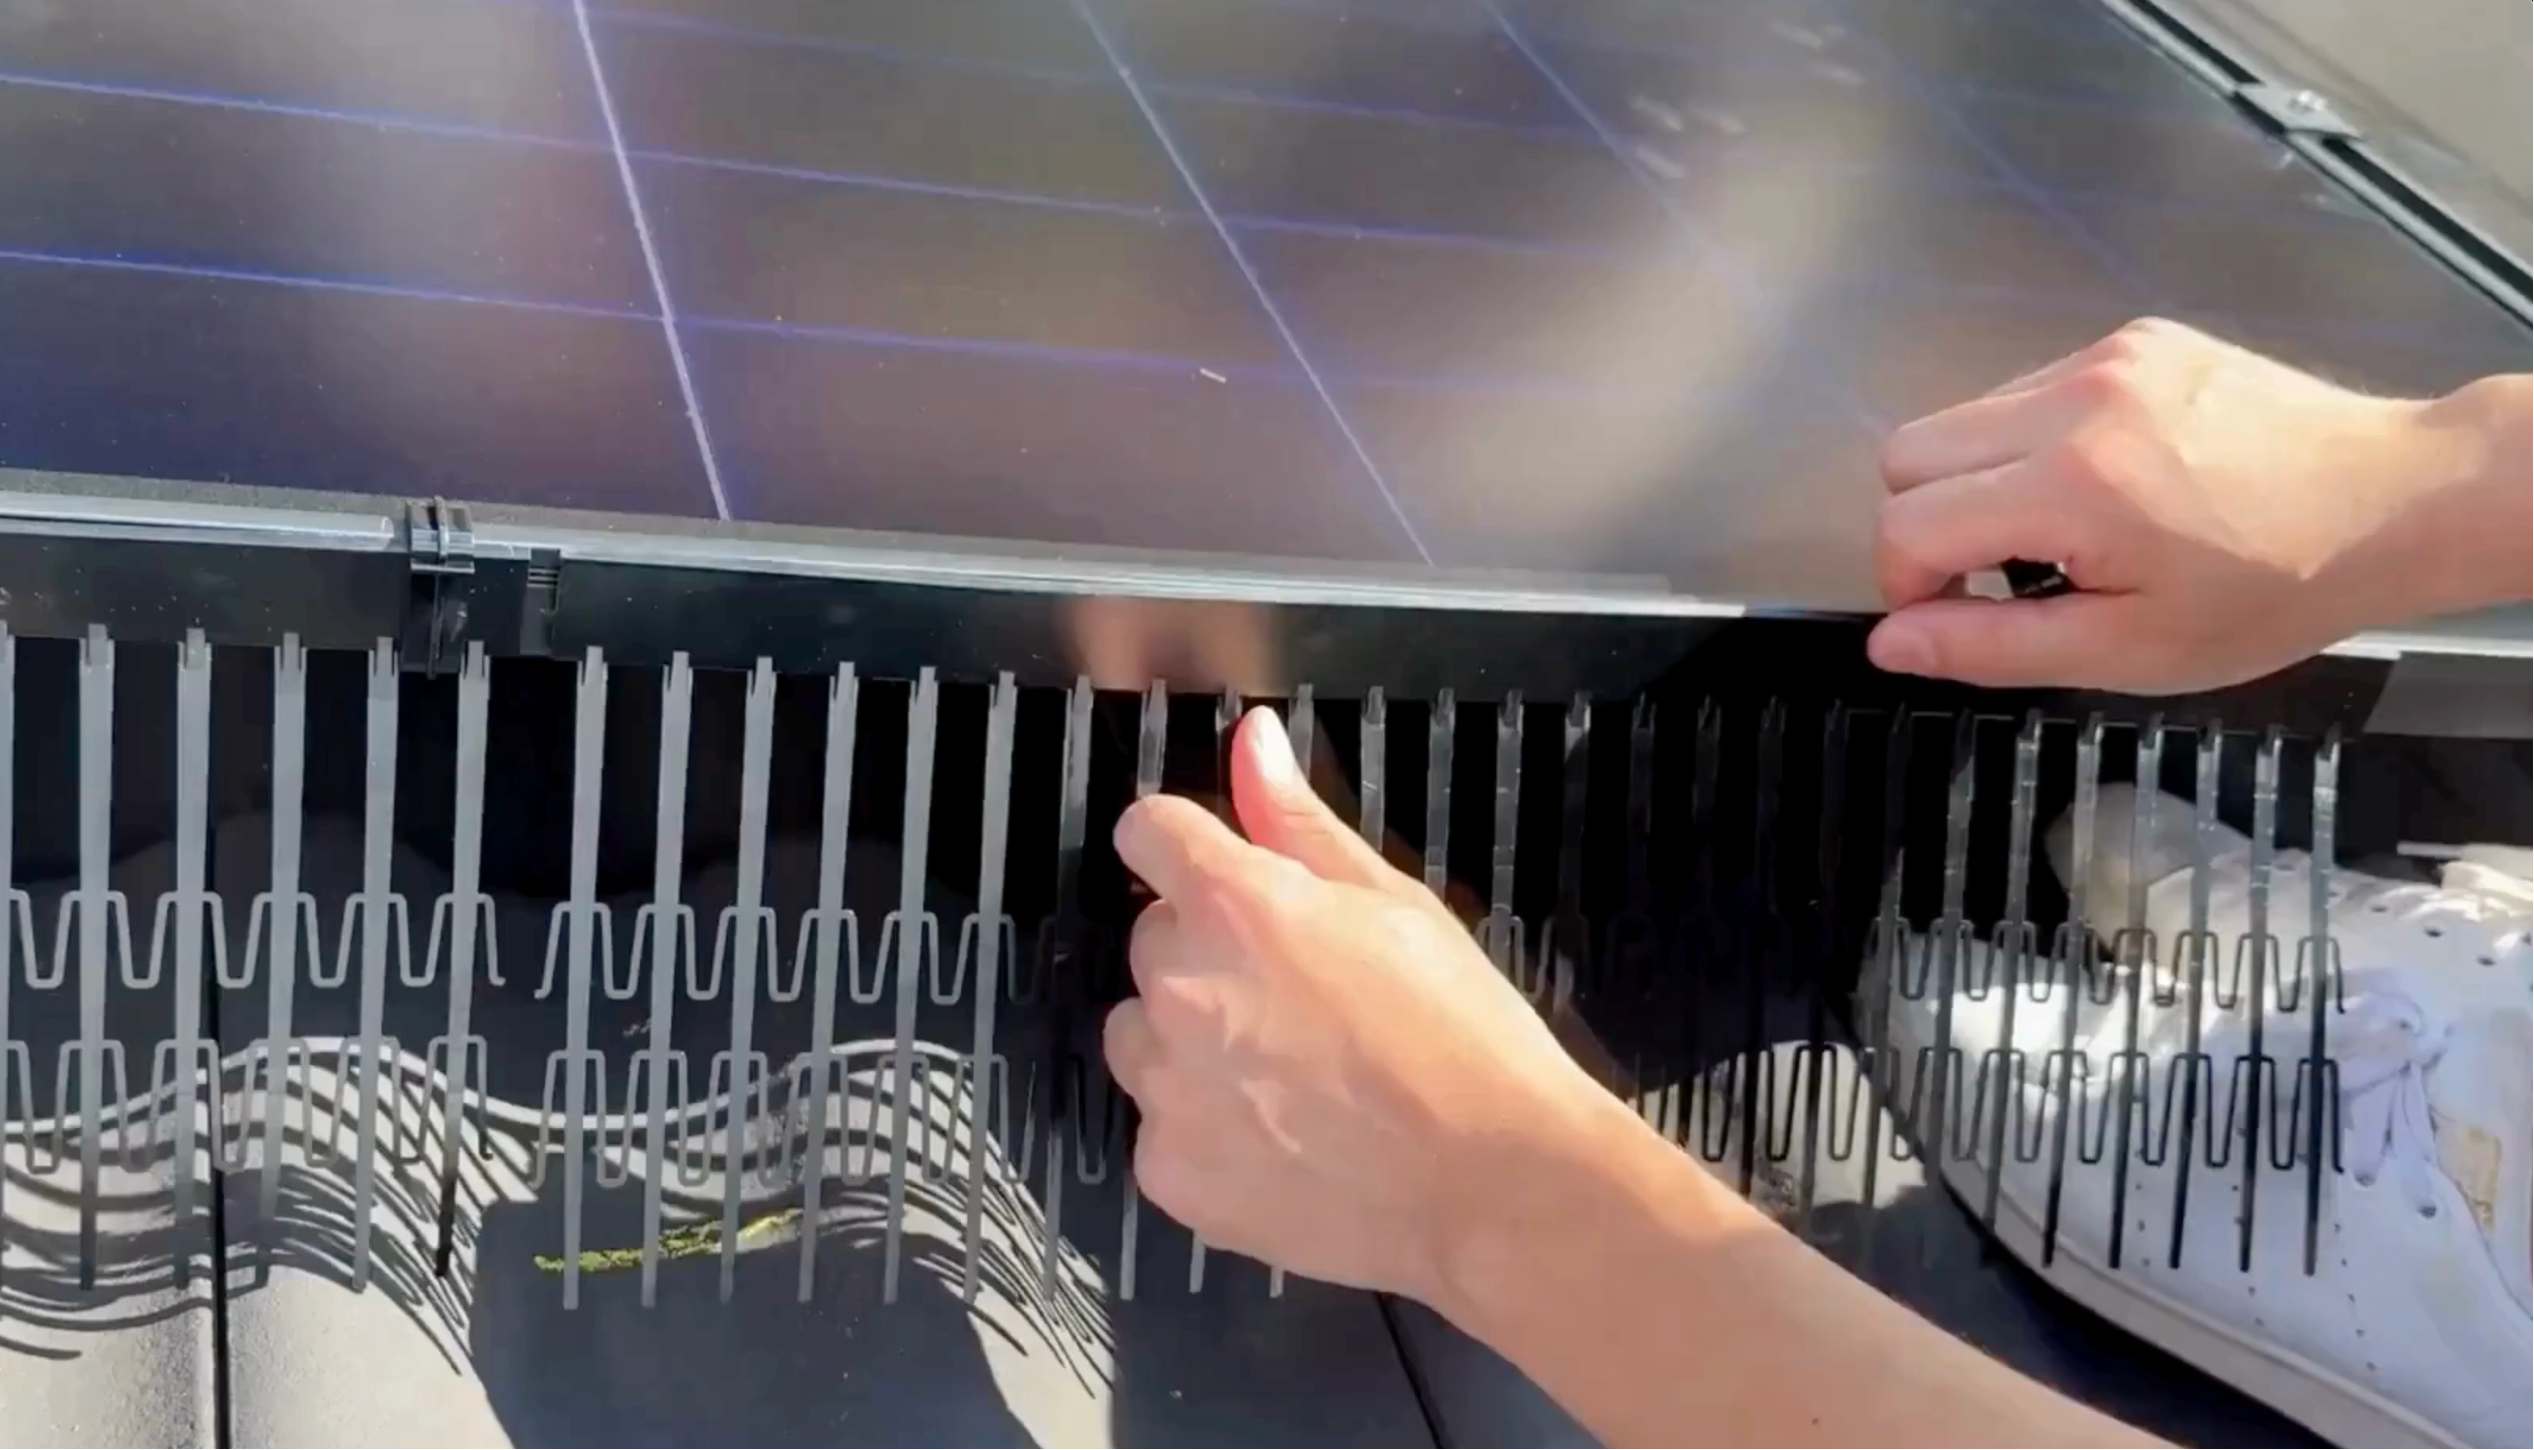
Perimeter Segments, extruded from HDPE with UV stabilisers 944 and 622, are what actually closes the gap under the module row. They are available in 150 mm and 200 mm heights, chosen to suit the standoff between the module edge and the roof surface.
Cable Ties of UV-stabilised PA66 secure the segments to each other and to the array at the points where continuity matters.
Three components, one mounting principle: clamp, do not modify. The full component and sizing logic is set out in our solar panel bird proofing kit guide, and the mechanics of the clip itself in our article on clip-on bird protection for solar panels.
The system carries a 10-year warranty. That figure is only defensible because the mounting method does not depend on a bond line, a cured surface or a fastener that somebody has to torque correctly at the top of a ladder.
What This Means When You Are on the Roof
The practical consequences of a clamp-only design show up immediately.
No drill goes up the ladder for the bird-protection step, so there is no swarf, no pre-drilling, no battery to run flat and one less tool to drop. Fitting is tool-free, which means the roof lead's hands stay free for the ladder and the material.
Sizing is decided on the ground, not improvised on the roof. The two variables are frame height — 30, 35 or 40 mm — and segment height — 150 mm or 200 mm. Both are read off the module datasheet and the standoff before anyone climbs. That is the whole specification.
Nothing about the array changes. Module frames, rails, clamps, roof hooks and cable routing are exactly as the racking design left them, which keeps the module and mounting warranties clean and keeps the handover file simple. It also makes the commissioning photo set easier to interpret later — see our solar commissioning checklist for what is worth photographing before the ladder comes down.
Reversibility: The Test Most Fixings Fail
The question that separates the three rejected methods from the one we use is not "does it hold?" — all four hold on day one. It is "what happens when this has to come off?"
Modules get swapped under warranty. Inverters get replaced and strings get re-pulled. Roofs get re-covered. Somewhere in a twenty-five-year operating life, a technician will need the bird-protection layer out of the way and will want it back afterwards.
A clipped component comes off by hand and goes back on by hand, which means the segment that was removed for a module swap is the same segment that closes the perimeter again the next morning. A screwed component leaves holes. A bonded component leaves residue. Both of those are permanent decisions made on behalf of whoever owns the system in fifteen years.
That is the whole argument for skipping screws, hooks and adhesives. Not that they do not work — that they cannot be undone.
The Short Version
Fixing an accessory to a photovoltaic module is a decision about the module, not about the accessory. Drilling the frame changes a qualified construction, adds a corrosion path and weakens the warranty position. Hooks add penetrations and sealing points the roof design did not plan for. Adhesives depend on surface conditions a roof cannot guarantee and leave residue that is difficult to remove without damage.
Clamping avoids all three. C-Clips in UV-stabilised PC+ABS grip 30, 35 and 40 mm frames, Perimeter Segments in HDPE with UV stabilisers 944 and 622 close the gap at 150 mm or 200 mm, and UV-stabilised PA66 Cable Ties tie the run together — on pitched roofs, with nothing drilled, nothing glued and nothing that cannot be reversed.
Comments