
Solar Commissioning Checklist: What to Photograph Before Handover
Every installer has a version of the same story. A customer calls eighteen months after handover about a fault, a nest, a loose cable or a cracked tile, and the conversation turns on one question: what did the roof look like on the day you left it? If the answer lives in one person's memory and a handful of phone snapshots nobody can find, the installer is arguing from a weak position. If the answer is a dated set of photographs filed with the commissioning documents, the conversation is usually short.
This solar commissioning checklist is about that second outcome. It lists the photographs worth taking on a pitched-roof installation before the ladder comes down, explains why each one matters later, and shows how to file them so they are still useful when the system is five years old. It assumes a rooftop array on rails above tiles or metal sheeting with a defined lower module edge — the configuration PV Protector® is built for. Unlike pitched roofs, flat-roof, ground-mounted and open-field systems have different documentation needs and are outside the scope of this guide.
Why a Solar Commissioning Checklist Needs a Camera
The written commissioning record captures test results, serial numbers and settings. It does not capture what the installation physically looked like. Photographs fill that gap, and they do three jobs at once.
First, they establish a baseline. Roof condition, cable routing, the state of the tiles around each hook, the position of every component — all of it is fixed on the day of handover. Anything that changes afterwards, whether through weather, birds, rodents or a third party working on the roof, can be compared against that baseline instead of argued about.
Second, they protect the warranty position on both sides. Module and mounting manufacturers, and PV Protector® for its bird-protection components, want to see that the product was installed as specified. A photo of a C-Clip correctly seated on a 35 mm frame is worth more than any verbal assurance when a claim is being assessed.
Third, they make the next visit faster. An annual inspection or a retrofit quote starts with the question "what is up there?" A good photo set answers it from the office, so the person going up the ladder already knows which roof face, which row and which edge to look at. Our solar panel maintenance checklist template is designed to sit alongside exactly this kind of photo record.
The international framework for what an installer hands to the customer is IEC 62446-1, which defines the information and documentation required to be handed over following the installation of a grid-connected PV system. The photo set described here does not replace that documentation; it complements it, and national or insurer requirements may add items of their own. Check what applies in your market before you finalise your standard handover file.
The Photo Set: What to Capture and Why
The order below follows the order of the work. Shooting in sequence means the photos tell the story of the installation from the outside in, and it means nothing gets forgotten because the perimeter was already closed.
1. Context shots of every roof face
From the ground, photograph each roof face carrying modules, with enough of the building in frame that the face can be identified without a caption. Add one shot from the street that shows the whole property. These are the photos that get pulled up first in any later conversation, so take them in good light and keep the camera level.
2. Roof penetrations, hooks and flashing
Before the modules go on, or wherever they remain visible afterwards, photograph every roof hook, every penetration and every flashing detail. Include the tile or sheet around it. Cracked or displaced tiles discovered later are the classic dispute, and a dated photo of an intact tile next to a hook settles it.
3. Cable routing and connectors under the array
This is the photo set most often skipped, because by the time anyone thinks of it the modules are on and the cables are hidden. Shoot the DC cable runs, connector positions, cable ties and any cable management under the modules while the lower edge is still open. Our guide to the two-person solar installation workflow builds this photo stop into the sequence so it is not missed.
4. The open lower edge before bird protection
Photograph the gap along the lower and side edges of the array as it exists before any bird protection goes on. Show the module frame, the rail, the tile surface beneath and the height of the gap. If the customer later asks why bird protection was recommended, or an insurer asks what was done to prevent nesting, this is the before picture.
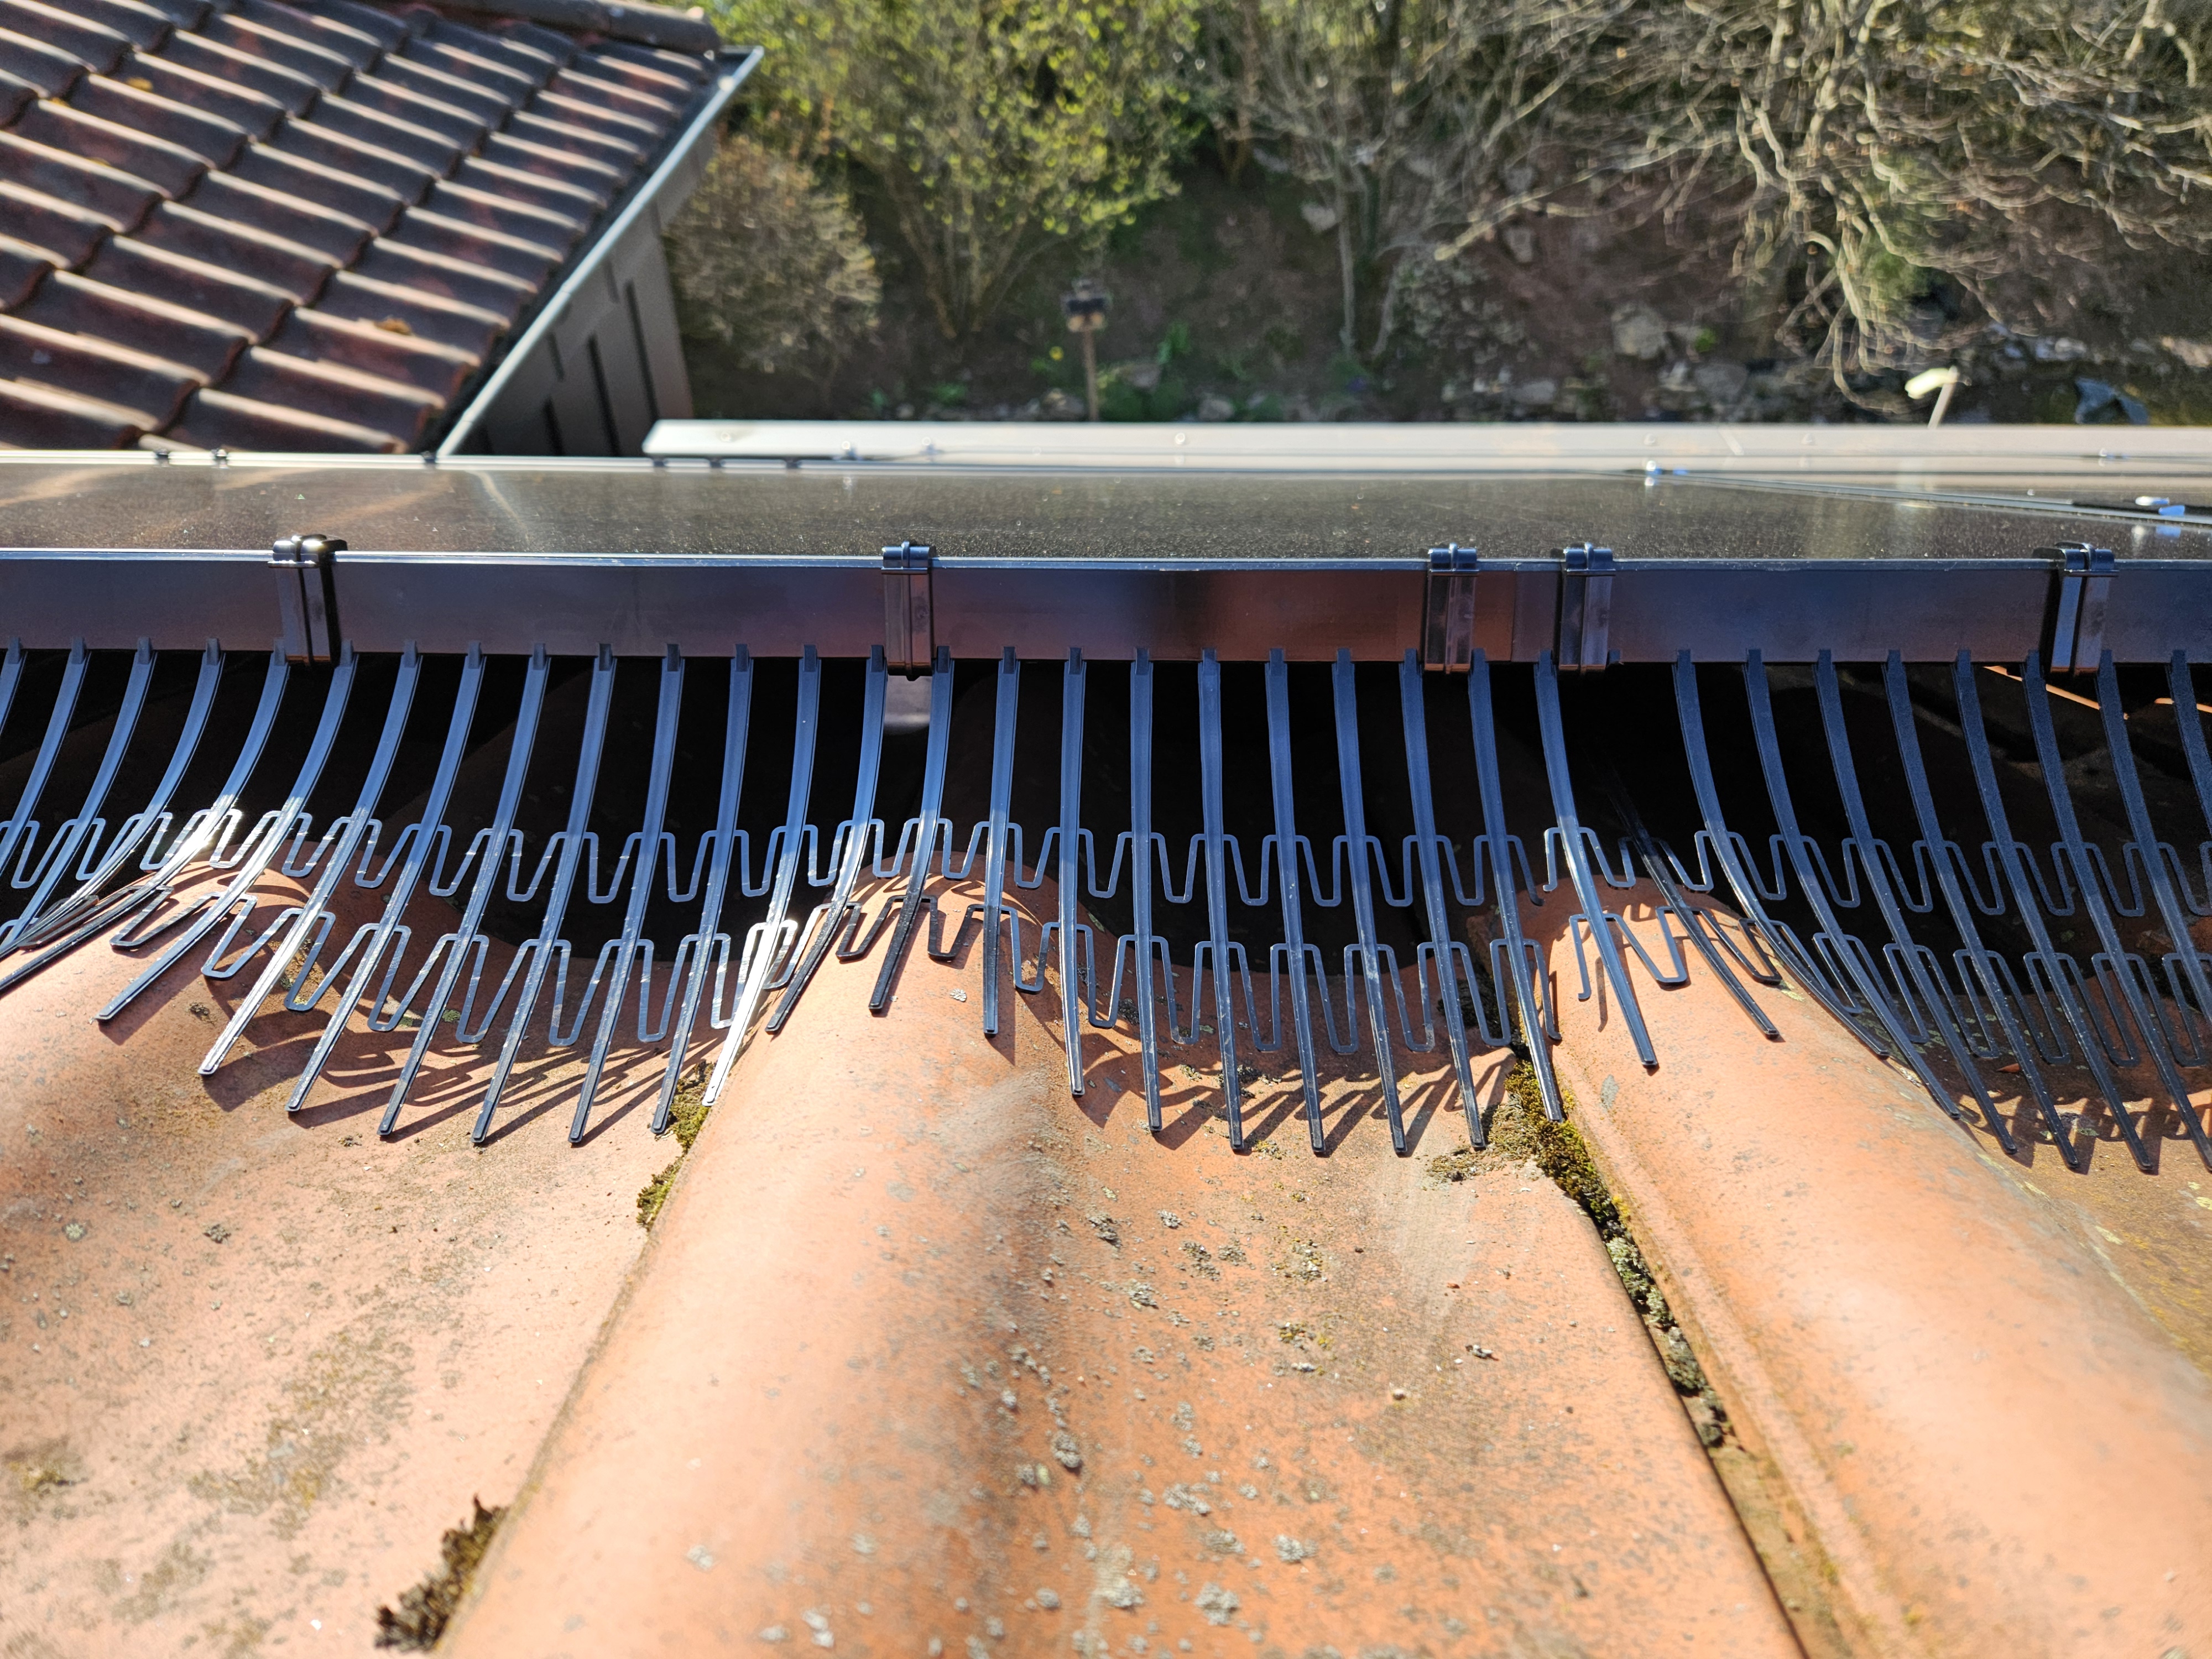
5. Perimeter Segments and C-Clips in place
Once the perimeter is closed, take a full-length shot of each edge run, then close-ups where the detail matters: a C-Clip seated on the module frame, the overlap where two Perimeter Segments meet, each corner, and the Cable Ties securing the run. Include at least one photo with a tape measure or a known reference in frame so the frame thickness and the Segment height are readable later. These are the photos a warranty assessor will want.
6. Inverter, isolators and labelling
Photograph the inverter with its display or status lights visible, the DC and AC isolators, the labelling on the distribution board and any warning labels required in your market. Add a screenshot or photo of the monitoring portal on day one showing the system producing. This connects the physical installation to the commissioning test record.
7. Roof condition and surroundings at the end of the day
Finish with the same context shots as at the start, plus gutters, valleys and any area where debris from the work could have been left. A clean roof and empty gutters on the handover photos remove a whole category of later complaints.
How to Shoot So the Photos Are Usable Later
A photo that cannot be located or interpreted in five years is not documentation. A few habits make the difference.
Overview before detail. For every element, take a wide shot that shows where it is, then the close-up. A close-up of a C-Clip with no context could be on any roof in the country.
Same order, every job. Follow the seven groups above in the same sequence on every installation. Your team will learn the rhythm, and anyone reviewing the file later will know where to look.
Include a reference. A tape measure, a folding rule or a gloved hand next to a component gives scale. It turns "the gap looked about right" into a measurable record.
Mind the light. Modules reflect sky. Shoot with the sun behind you where possible, and avoid photographing the glass at a shallow angle. For the underside of the array, a head torch or phone light works better than flash.
Keep the timestamp. Leave the camera's date and time metadata on. If your phone strips it when sharing, transfer the originals rather than compressed copies.
Name by roof face and row. A file called IMG_4471 helps nobody. A file called south-face_row1_lower-edge_clip-detail_2026-09-14 can be found by someone who was never on site.
Filing and Handover
Store the full-resolution set with the commissioning record, not on one person's phone. The customer receives a copy — or a link — as part of the handover file, together with the written documentation. That copy is not a courtesy; it is what allows the customer to answer an insurer's or a buyer's questions about the system without calling you, and it demonstrates that the work was done to a standard.
Keep the same set in your own project archive for as long as the longest warranty on the roof runs. For PV Protector® components that means at least the 10-year warranty period. If a claim or a dispute arises, the photos are the first thing anyone asks for.
The pre-installation record matters too. The photographs from your solar pre-installation site survey show the roof before any work started; the commissioning set shows it after. Together they bracket the job completely.
Where the Solar Commissioning Checklist Pays Off Later
The value of the photo set shows up in the situations installers least enjoy.
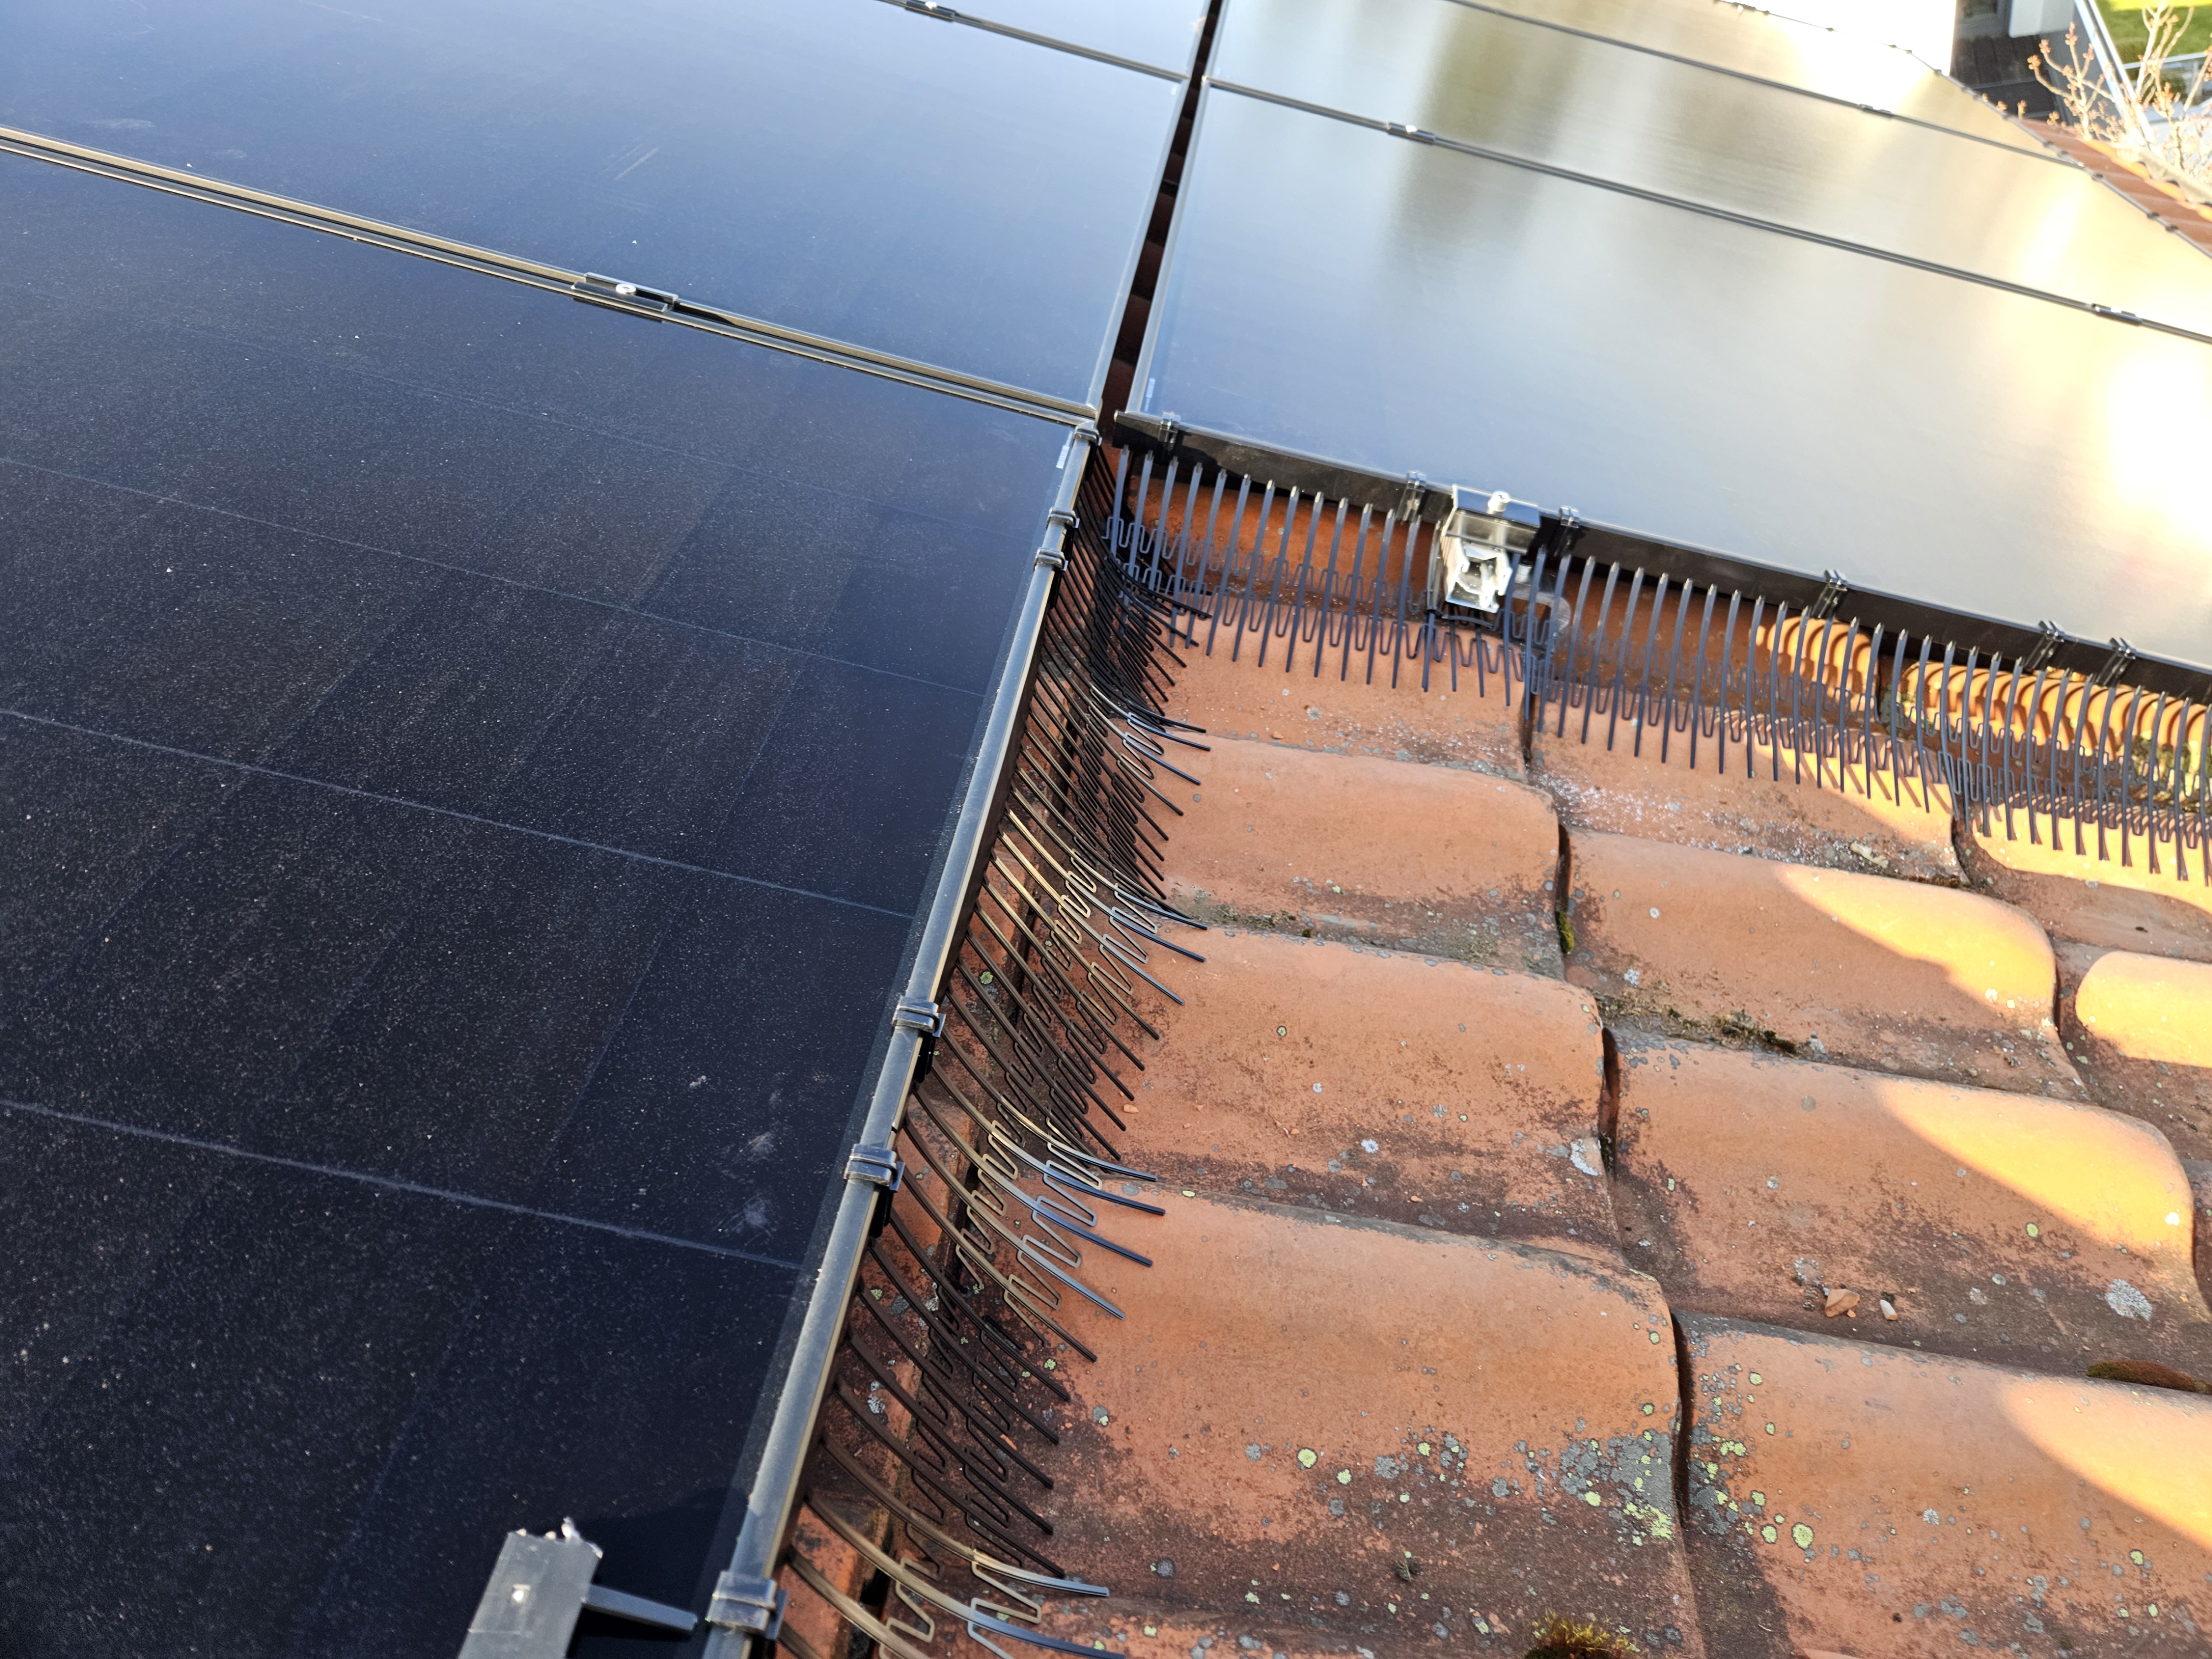
The callback. A customer reports birds under the array in year two. The commissioning photos show whether the perimeter was closed on every edge, whether a Segment was omitted around an obstacle, and what the gap height was. That determines whether the visit is a warranty matter, a retrofit quote or a conversation about a third party who removed a Segment to access a satellite dish.
The tile complaint. A roofer working on a chimney finds a cracked tile near a module hook and the customer assumes it dates from the solar installation. Photo group two answers the question in one email.
The insurance query. Installer feedback (anecdotal, not a measured statistic) is that insurers and loss adjusters increasingly ask what was done to prevent nesting under rooftop arrays. Photo groups four and five show the before and after.
The resale. A property changes hands and the buyer's surveyor wants to know what is on the roof. A handover file with photographs makes the system an asset rather than a question mark.
The next quote. When the same customer asks about extending the array or adding protection to a second roof face, the photos let you quote from the office. Our checklist of installer tools and components for bird proofing covers what goes in the van for that follow-up visit.
Documenting a PV Protector® Installation
The bird-protection components on a pitched roof are worth photographing with the same care as the electrical work, because they are the parts most exposed to weather, birds and curious hands.
PV Protector® closes the array perimeter with three engineered components. The Perimeter Segments, made of HDPE with UV stabilisers 944 and 622, form the barrier and come in two heights, 150 mm (Standard) and 200 mm (Extended). C-Clips moulded from UV-stabilised PC+ABS snap the Segments onto module frames of 30, 35 and 40 mm — tool-free, with nothing drilled or glued to the frame, so the module warranty is not affected. UV-stabilised PA66 Cable Ties secure the run. The system is covered by a 10-year warranty per the manufacturer specification and is designed exclusively for pitched roofs with a defined lower module edge.
For the warranty file, the photos that matter are the ones that show the installation was done as the installation manual describes: C-Clips fully engaged on the frame, Segments overlapping at joins rather than butting with a gap, corners closed, and Cable Ties in place. One full-length shot per edge plus close-ups of each corner and join is enough. It takes a few minutes at the end of the job and it is the difference between a documented installation and an undocumented one.
Make the Camera Part of the Job
A solar commissioning checklist that stops at test results leaves the physical installation undocumented. Seven groups of photographs, taken in the same order on every job and filed with the handover documents, close that gap. They protect the customer, they protect the installer, and they make every later visit — inspection, retrofit, warranty — faster and less contentious.
To specify PV Protector® for pitched-roof systems, or to discuss installer and distributor conditions, contact the PV Protector® team.
Comments